Hey All You COFFEE LOVERS. For years now my friends have asked me for my coffee recipe and so here is how I make it and why you won’t find it elsewhere! Cold Coffee is called Iced Coffee in USA. It is my favorite, quick recipe to drink on hot summer days. Now this is an old post, I am re-sharing because over the years my coffee has remained true to it’s heroic talent.
So welcome Arizona, to yet another year of a heated mess. Although I love the heat any way, I love it even more with my Cold aka Iced Coffee. What I hate about iced coffee from Starbucks or elsewhere is that they pack with a load of ice with coffee and dairy that tastes very separated, non-blended and unappealing. Or, they pack it up with froth and cream that is heavy fat and sugar, unnecessary for making a tantalizing coffee shake.
Yesterday i.e. on May 6th, 2018, I made this cold coffee once again for my daughter’s teacher and that too without any sugar in it and with v. little dairy. She loved it and sipped every inch to the bottom.
Ingredients:
– Cold milk of any kind: Dairy or Non-dairy: 250 ml
– Instant Coffee Powder: Nescafe normal or African coffee powder
-Sugar / Stevia / Agave: as needed
-Spices: Pinch of Cinnamon Powder or Cardamom Powder, pinch of Ginger Powder
-2-3 ice cubes, blender and a Coffee-ing Heart
HOW TO MAKE IT:
– Add milk, sugar, coffee and ice. Be sure not to overdo the ice beyond 2-3 cubes . Blend it. Taste it for sugar and modify the sugar as needed.
LOVE: I make it with immense love. I love coffee and love making it for others!
CREATIVE: I have never looked up any coffee recipe, let alone other recipes. I am not the person who can be patient reading recipes, I rather create one of my own!
SPICES: Cinnamon powder and ginger powder. Appx. 2 pinches in each glass.
OTHER STUFF: 4 med. sized ice cubes per glass, blender, milk (any), sugar, coffee.
Other times I switch the cinnamon for cardamom. Cinnamon gives a spicy ‘kick’ and cardamom gives it sweetness, choose either.
Today I am sharing a very quick, easy smoothie recipe for you. It is perfect for anyone who needs to have more nutrition run down their gut; and can be used for those allergic to dairy. You may use dairy or non-dairy milk for this smoothie. Make it a part of your daily snack, breakfast or be a charming host.If your kids are anything like mine, ‘fuzzy’ is a word often used. She is a typical ‘vat’ personality – dislikes eating, lazy to chew, rather play than eat! While I worry about her nutritional needs being met, it also helps me get creative.
This smoothie was such a creative attempt. I just took whatever came to my mind, put them all together and ‘churn’ went the grinder. In just a few minutes, we had a ‘Happy Mom’, a ‘Healthy Snack’ and a clean kitchen.
MAKES: 2.5 regular sized glasses
INGREDIENTS:
Orange – one medium size
Banana – one medium size
Rice Milk – 1.5 glasses filled to the top or Milk or Soy Milk
Ice – a few cubes
Sugar – 1 Tbsp
Elaichi (Cardamom) – 1 small pod. You can use half if you want a milder flavor
HOW TO:
Mix it all
Churn
Pour
Drink
OPTIONAL: You may strain it in a big strainer for extremely fuzzy kids, to remove the orange fibers. You may also use any milk – dairy, rice or soy. I used Rice milk and that is the best I can vouch for in terms of taste and consistency! It was gone in seconds, we all loved it!
VARIATION 1:
Watermelon
Banana
Rice milk
Sugar
Elaichi
Mix, churn, strain, pour, enjoy!
VARIATION 2:
Grapefruit
Orange
Rice milk
Sugar
Vanilla extract – 1/6th tsp
Mix, churn, strain, pour, enjoy!
I hope this has given a quick breakfast or snack option for yourself and your kids. It is filling, energizing and absolutely lip smacking! More so, your kids can easily make this with you and it can be a great add on for your parties!
Prep. + cooking time is just 10 mins! Early morning nuisances is a Ghar Ghar ki Kahani. “Jaldi Khao!” Well, this recipe is for that naughty rebellion, the slow eater or the typical kid who eats with his eyes.
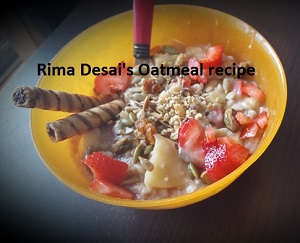
I enjoy oats thoroughly. I use them in several ways and here is a recipe inspired by my fruit cravings and allergy to milk. I love fruits, nuts and oats but never before have I thought of putting them together in such an amazing way. Since I am the mom who is always on the go, with a long list of things to do daily, I need something quick for ME in not my daughter ;) I am also a VEGAN, SOY and ALMOND allergic, so this recipe is perfect for my sweet tongue and early morning starve!
Makes for Kids 3 years +
Makes a great taste for the Adult Kid too ;)
The best part of this recipe is that it is very flexible. You can modify your choice of fruits, seeds and nuts or leave them out. You can cut them smaller for toddlers and add more sugar if needed. Also, since this recipe has Banana, serve it immediately or add all fruits just before serving. You can keep them chopped and stored separately for later use.
I took OLD FASHIONED QUARKER OATS here but you could take Instant Quarker Oats if needed.
Since this is for 2 to 3 kids, you can reduce or increase the quantity of each item as needed. Half an apple, half a big banana, 7 medium strawberries, 1.5 Tbsp. of sunflower + pumpkin seeds, 1.5 Tbsp. of Pistachios, 2 rolled wafers (optional) and 1/4 Tbsp of Sugar. Add RAISINS and CRANBERRIES if your kids like them :)
COOK AND PREP.
Oatmeal in the hot water for 8 – 10 minutes (as you usually cook oatmeal). Add the raisins and cranberries from the start (when the water is getting heated). While the oats are cooking, chop your fruits fine or medium sized. Once the oats are cooked, switch off stove, add the fruits you desire. You can add apricots for kids who need more iron or any (non-sour) fruits of their choice.
Add the nuts, seeds and sugar as per your choice. Almonds, walnuts, cashew halves, etc. . Add the rolled wafers if you are ok with it (once in a while) and you are good to go! This is a HEAVY MEAL. It is highly satiating, nutritious, filled with carbs, proteins, vitamins and minerals, perfect for breakfast and on the go moms.
Add milk if desired but I would not recommend it given the mix of fruits. This recipe requires very less sugar because banana, apple and raisins made it sweet. 1/4th Tbsp of sugar per child is a great breakfast. Cereals typically have a LOT more sugar than that.
Prep. + cooking time is just 10 mins! Early morning nuisances is a Ghar Ghar ki Kahani. “Jaldi Khao!” Well, this recipe is for that naughty rebellion, the slow eater or the typical kid who eats with his eyes.
I enjoy oats thoroughly. I use them in several ways and here is a recipe inspired by my fruit cravings and allergy to milk. I love fruits, nuts and oats but never before have I thought of putting them together in such an amazing way. Since I am the mom who is always on the go, with a long list of things to do daily, I need something quick for ME in not my daughter ;) I am also a VEGAN, SOY and ALMOND allergic, so this recipe is perfect for my sweet tongue and early morning starve!
Makes for Kids 3 years +
Makes a great taste for the Adult Kid too ;)
The best part of this recipe is that it is very flexible. You can modify your choice of fruits, seeds and nuts or leave them out. You can cut them smaller for toddlers and add more sugar if needed. Also, since this recipe has Banana, serve it immediately or add all fruits just before serving. You can keep them chopped and stored separately for later use.
I took OLD FASHIONED QUARKER OATS here but you could take Instant Quarker Oats if needed.
Since this is for 2 to 3 kids, you can reduce or increase the quantity of each item as needed. Half an apple, half a big banana, 7 medium strawberries, 1.5 Tbsp. of sunflower + pumpkin seeds, 1.5 Tbsp. of Pistachios, 2 rolled wafers (optional) and 1/4 Tbsp of Sugar. Add RAISINS and CRANBERRIES if your kids like them :)
COOK AND PREP.
Oatmeal in the hot water for 8 – 10 minutes (as you usually cook oatmeal). Add the raisins and cranberries from the start (when the water is getting heated). While the oats are cooking, chop your fruits fine or medium sized. Once the oats are cooked, switch off stove, add the fruits you desire. You can add apricots for kids who need more iron or any (non-sour) fruits of their choice.
Add the nuts, seeds and sugar as per your choice. Almonds, walnuts, cashew halves, etc. . Add the rolled wafers if you are ok with it (once in a while) and you are good to go! This is a HEAVY MEAL. It is highly satiating, nutritious, filled with carbs, proteins, vitamins and minerals, perfect for breakfast and on the go moms.
Add milk if desired but I would not recommend it given the mix of fruits. This recipe requires very less sugar because banana, apple and raisins made it sweet. 1/4th Tbsp of sugar per child is a great breakfast. Cereals typically have a LOT more sugar than that.
Tea or Coffee it is that divides the world into two seemingly equal halves. I have seen the steaming coffee mugs make their way to the wake up alarm for a millennium in USA, ‘Masala Chai’ aka Spice Tea is the magic mantra in India. From little kids to adults, it is the rave in all Indian Households and few like me are the ‘weirdos’ who have departed the eternal bliss before even dating it. The chai walas – hawkers on streets that sell these in little glass mugs could be called the popular anchors for soap opera discussions, office conversations or a ‘hot date’.
Here is the recipe of Typical Indian tea that most west-east, north and south Indians drink daily morning and evening. You are lucky! This article comes with my YouTube tutorial
INGREDIENTS TO MAKE FOR ONE PERSON:
11/4 cup drinking water
1 inch piece of ginger
2 pinches of tea spice
1 Tbsp of INDIAN Tea Leaves – any brand but Indian tea only
3/4th to 1 Tbsp of Sugar
BEGIN
I 1/4th cup drinking water
Start to boil
Grate 1 inch piece of ginger in the water
Add 2 pinches of tea spice = chai (tea) masala to the water ~ buy from any Indian grocery store or online
Simmer 3 minutes
Tea leaves 1 Tbsp
Sugar 1 Tbsp – More or less may be added as per requirement. No sugar won’t bring out tea’s flavor. Some sugar is needed. Please don’t use zero calorie sugar or honey!
Boil and then simmer for 5 to 10 minutes. The more you simmer, the stronger the taste. I prefer just 7 minutes
Add 1/2 cup milk – 2% cow’s milk: doesn’t matter organic or non-organic
Boil, allow to rise, reduce stove to slow – medium
Simmer 5-7 minutes
Strain using minute net strainer
Serve hot with tea biscuits (cookies)
FOR 2 PEOPLE: 2 1/2 cups water, 11/2 Tbsp Tea leaves and same quantity of sugar, ginger and spice.
There are tons of eggless cake recipes online but there is one major problem with many of them – They are not uniform, different recipes can have so many different methods and ingredients that it can make us wonder which one to experiment. Trial and error is something I don’t enjoy while making cakes. Cakes don’t happen in a snip and a snap! My friends love my cakes. They are soft, eggless, not too sugary and are easy to make.
Many of those online recipes don’t give us the fluffly, airy, non-greasy texture we want our cakes to have. I am grateful to my sister’s recipe book with me which has helped me bake the cakes that my family and daughter adores. What can be a better expression than – “Mom I don’t want to eat any other cake. Your cakes are the best!”
I must admit, I am no pro with icing and I just do what I can manage best with. I am ready for a professional class for that but you can still use this recipe for a great sponge cake covered with grated chocolate, coconut flakes and basic icing. There is lot more to baking a cake perfectly and I don’t find myself having the space to list all of those small techniques here. But this basic recipe should get you started right away!
PREPARATION TIME: 20 to 30 mins.
COOKING TIME: 40 to 45 mins.
INGREDIENTS:
Prepare the baking molds by first layering a thin slice of butter, then sprinkle 2 to 3 Tbps of flour and spread it all around by turning the mold in all directions, ensuring the flour has spread to all sides. Alternatively, you can use parchment paper and thin layer of flour over it. Place the mold on a flat, room temperature surface and then, pour the smooth batter gently into the mold without touching it.
Maida (Bleached or unbleached wheat flour) or Self Raising Flour = 125
Condense Milk – 200gms or half tin
Butter, Ghee or Oil (Liquid form) – 60ml
Soda Water / Coke – 100 to 120ml
Vanilla essence or any essence of choice – 1tsp
Cocoa Powder – 1 Tbsp (Don’t add if making Vanilla Cake)
Drinking Choc – 11/2 Tbsp
Soad Bicarb (Edible Soda) – 3/4tsp
Baking Powder – 3/4 tsp
Chopped Nuts if you want – 1 to 2 Tbsps
METHOD:
Prep and Preheat the Oven to 325 degrees F. Mix all the Wet and all the Dry Ingredients in separate bowls. Sieve all the dry ingredients in a large (deep and wide) bowl. Sieving will help to smooth and remove any lumps. Slowly pour the wet ingredients over the dry ingredients and continue to mix them, stir them slowly with a hand whisk or spatula in ONE DIRECTION. Keeping the same direction ensures bubbles are formed and they remain (break if you change the direction). Mix all the wet and dry ingredients in a swift motion with a hand spatula or at the slowest speed with the machine whisk for 5 to 7 minutes (feels smooth, silky). Wear safety oven mittens and place the cake in the center of the oven safely. Close oven door, turn on oven light if you have that feature. Place a 25 minutes timer.
Bake in oven at 325 degrees for 25 to 50 minutes depending on the oven size, type and the quantity of batter.
WHEN TO KNOW IF IT’S READY: Do not open the oven in the midst of baking. That will release air bubbles built to rise the cake. In stead look at the cake from outside and see if the cake looks like it is rising and turning more brown. Ideally, the fragrance will tell you when it is baked. A strong, cake fragrance should fill the room. To check if baked fully, open the over door at 25 to 30 mins. and while wearing safety mittens, prick a toothpick (not knife) in the center of the cake or at 2-3 different places of the cake. If the toothpick comes out clean with no batter or sticky residue, then the cake is ready.
Place the cake in a cool, not heated area over a steel, metal wire frame to allow air to pass through the bottom and the top of the cake mold. Do not attempt to remove from the mold until it is completely cool.
This cake is a 3 layered cake with fondant on top of all the layer. I baked it for my daughter’s 4th Birthday along with purple icing cupcakes. The same recipe for cupcakes! You can see in the picture that the cherries were gone first!! L-O-L. The fondant layer should be thinner than the one in this picture.
I will be uploading later, a picture of the sponge cake with just chocolate dressing on top, with no icing. It was the 5 kg cake I baked on my daughter’s 1st birthday and it was just as delicious. I have so many of my cake pics, just have to find them from the plethora of images I have on record!
Freshly chopped vegetables of your choice + salt + rest of the three ingredients shown. I added 1 tsp. flax seeds and chia seeds, 3 Tbsps boondi, 1/2 tsp Tuscan Italian dressing.
I had carrots, purple cabbage, and green peppers left in my empty cold box (refrigerator) and so I didn’t have many of the veggies I would have added.
And – A salad can also bind countries, why bother about the peace talks ;)
Boiled potato = 1
Whole Oatmeal flour = 1 cup
Millet or Bajri flour = 1 cup
Whole wheat flour = 1.5 cups
Oil = 1.5 Tbsp total
Salt to taste
Cinnamon powder = 2 tsp.
Cilantro finely chopped 3 Tbsp. (optional)
Water to make Dough (appx 1 cup and better if warm)
HOW TO:
Mix all the flours in a large mixing bowl
Mash the boiled potato with your fingers and mix well with the flour
Add 1Tbsp Oil
Add rest of the ingredients
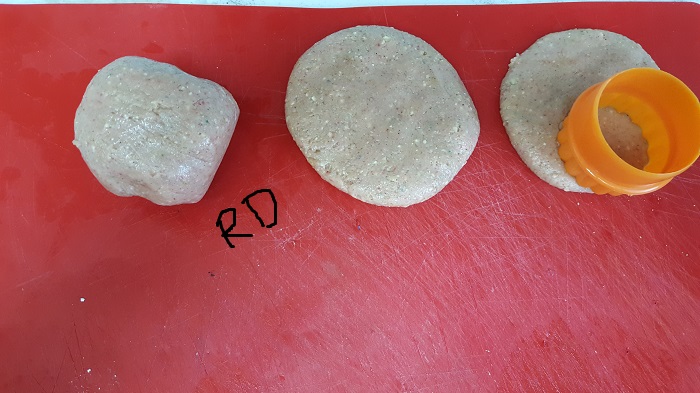
Slowly add bit of water (1/6th cup) and work it all around the mixture. Once that water is absorbed, add more water and in 3-4 parts, work with the water and flour mixture to make a semi-soft dough.
Your dough is ready to be rolled into thin or thick tortillas / rotis / rotlis / chappatis
A few days ago, I was lucky to have the chance to make this special dish for a very special person and my husband loves paneer dishes too! Paneer is a popular North Indian delicacy enjoyed in several meals especially during special occasions or treats. It is a dairy product and hence very high in protein. In India, we call it Cottage Cheese but in USA it is termed as Fresh Cheese (I am unsure of the other names for it).
Being the person that I am – I totally dislike being a ‘follower’. I have to add my own creativity or you can say a streak of ‘experiment’ or ‘rebel’ into my work. Hence, I am not the recipe book follower. This makes me want to make my own dishes, the way I want and add ingredients or procedures that others may refuse or normally not follow.
I can assure you that you will love this dish. It will leave you and your guests with a clean plate as long as you know how to ‘waist’ the salt and pepper ;)
1. Defrost Paneer
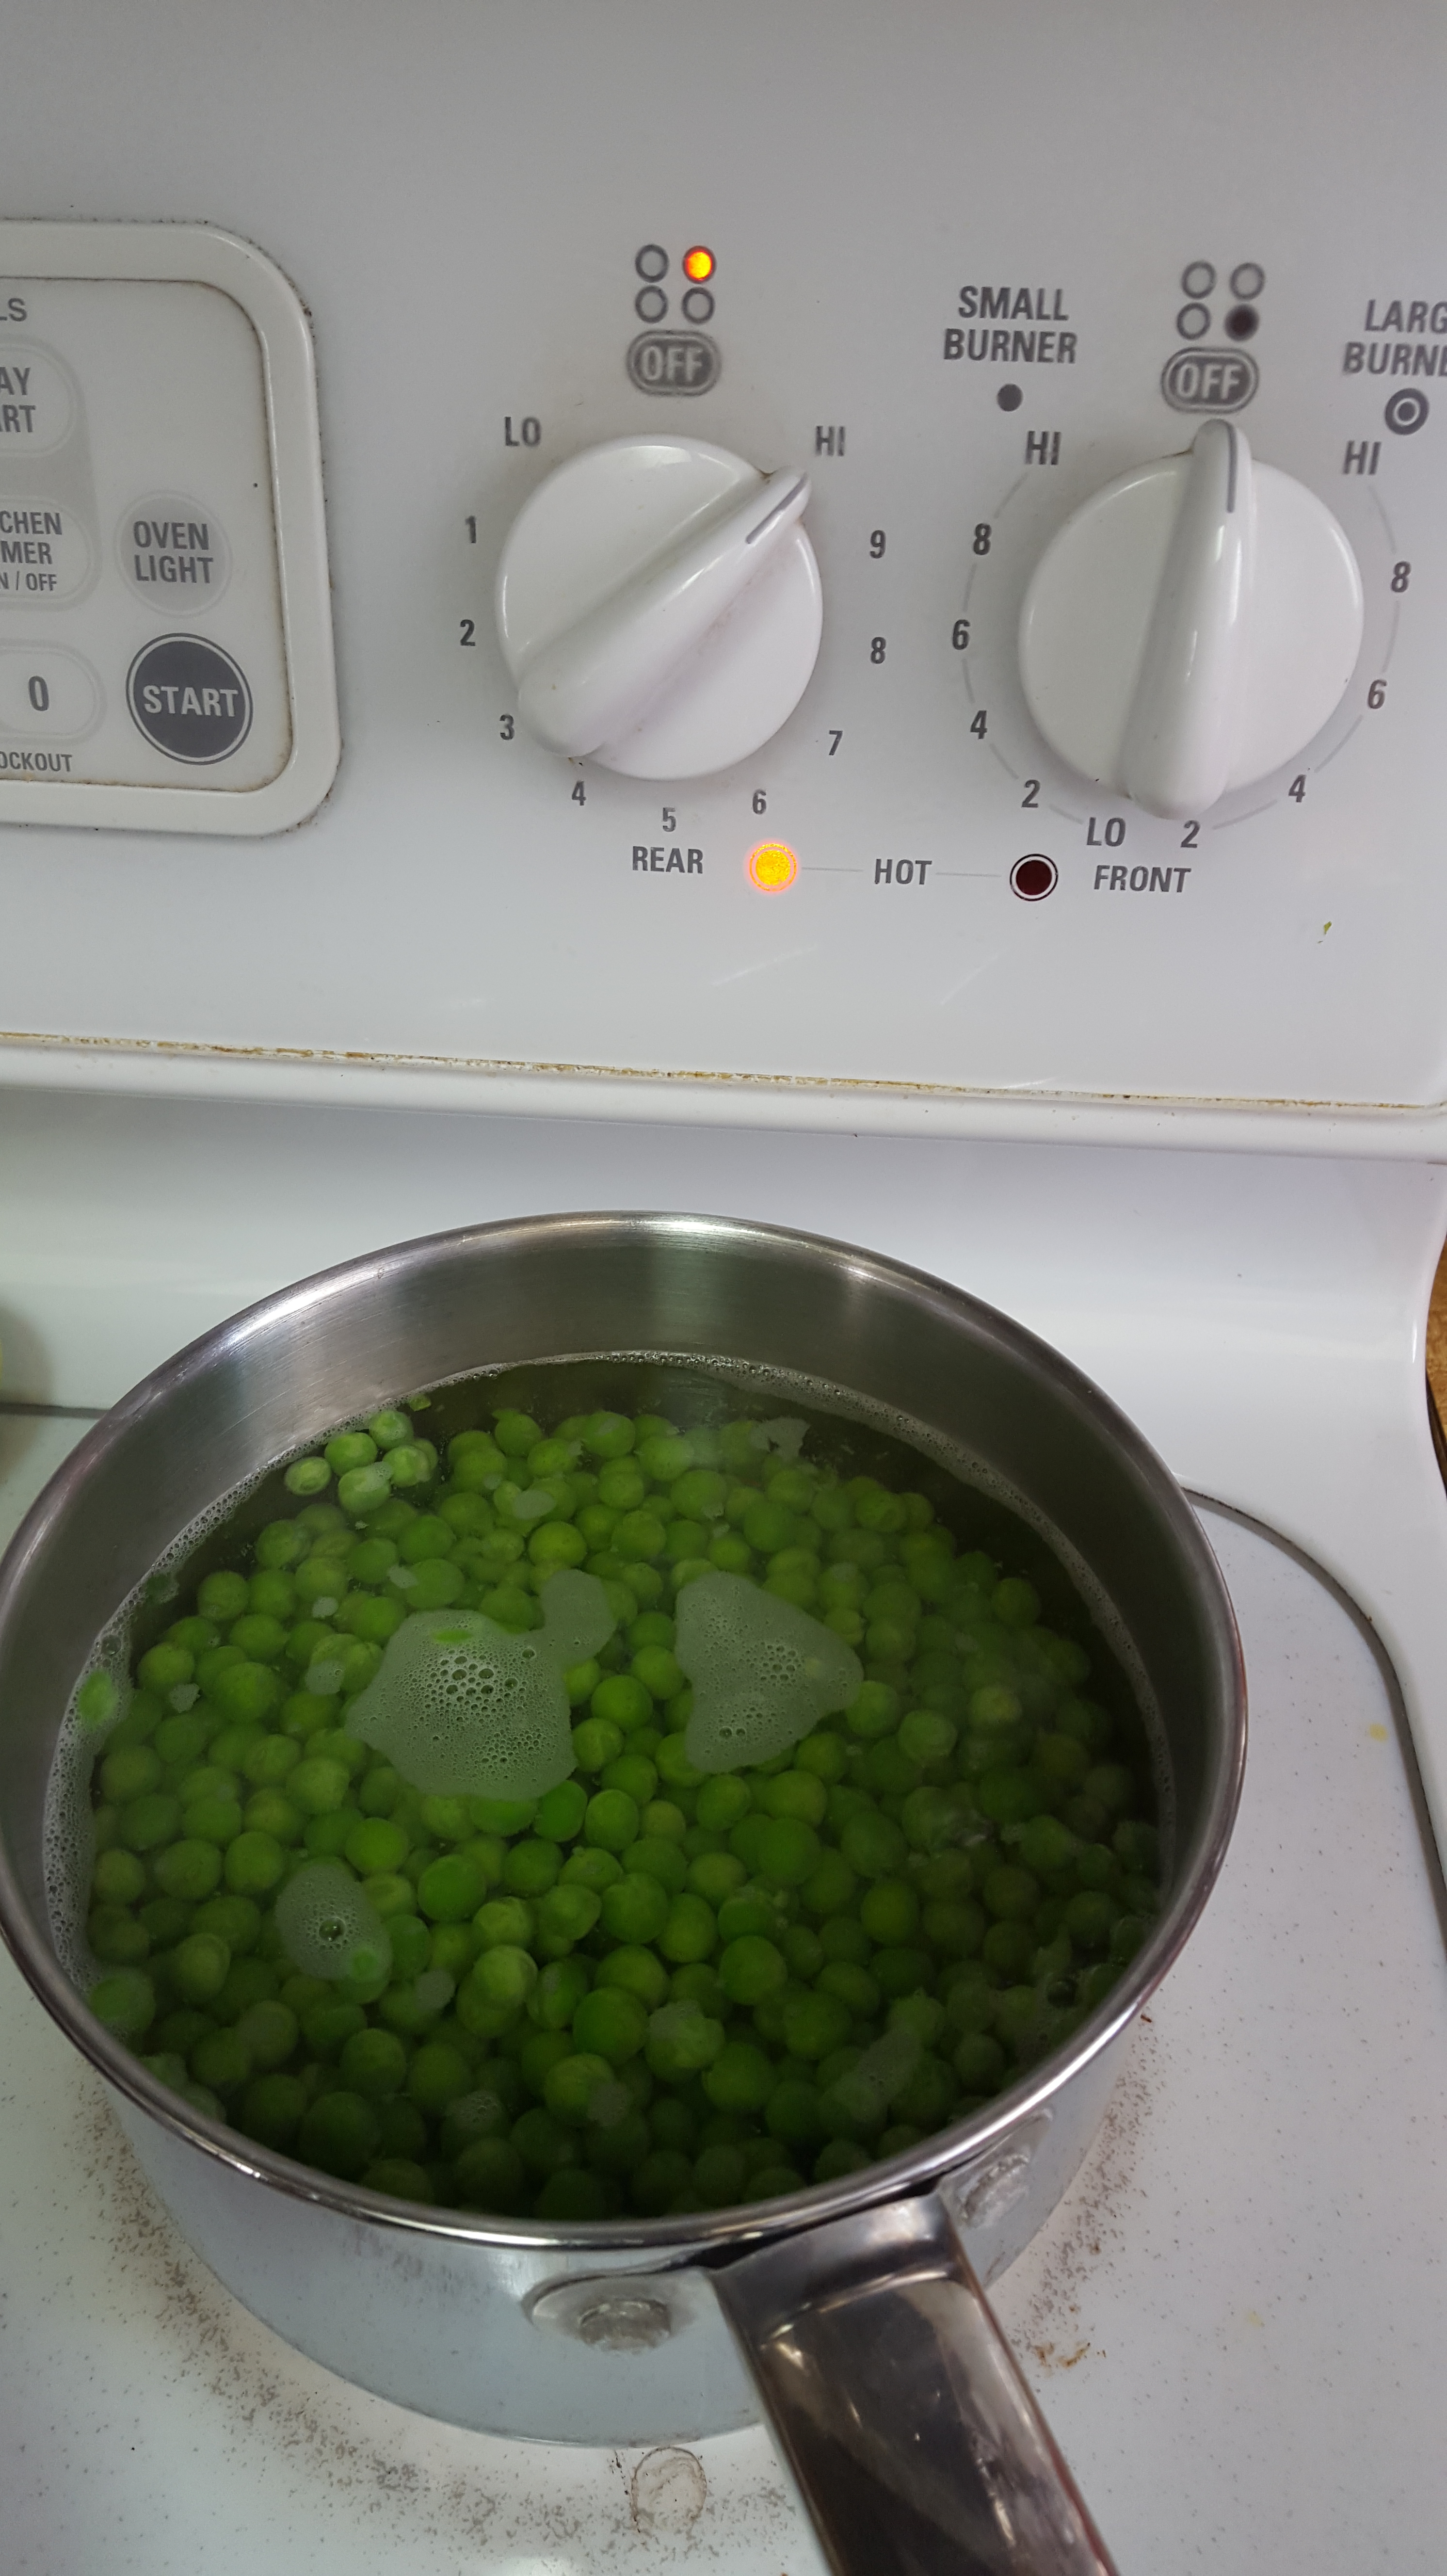
2. Put green peas to boil
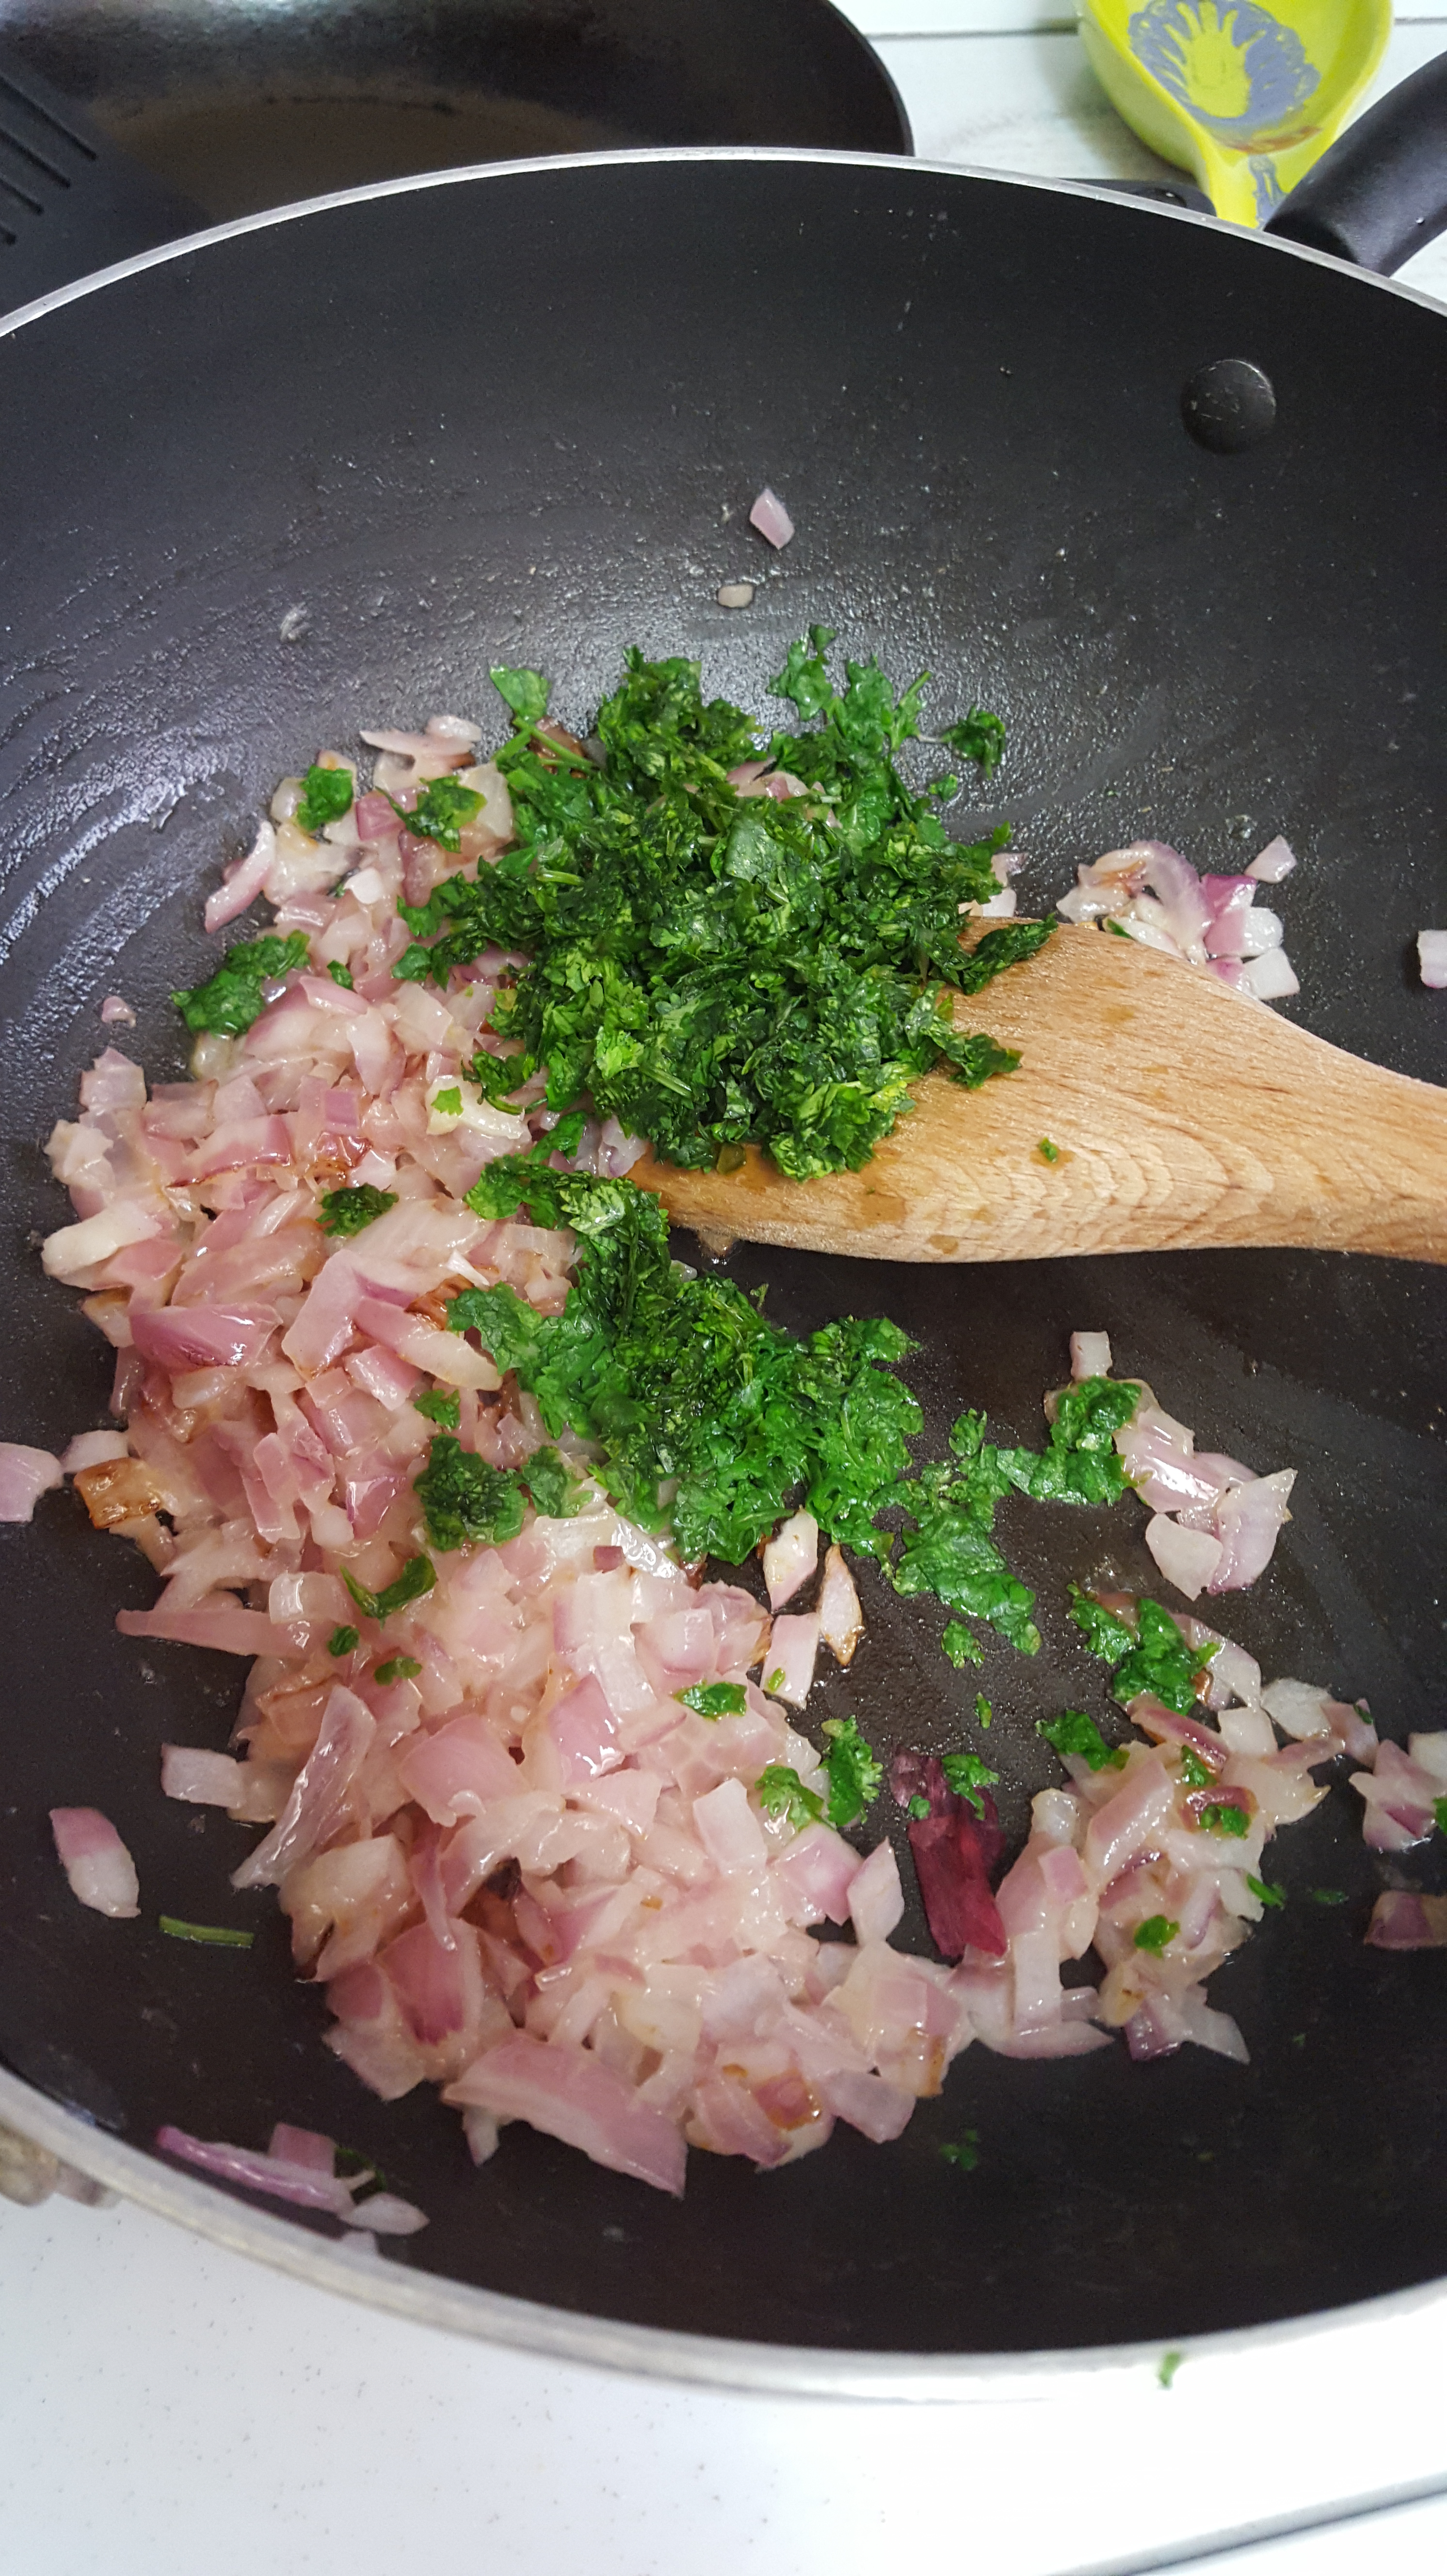
3. Saute fresh chopped Onions in oil or butter
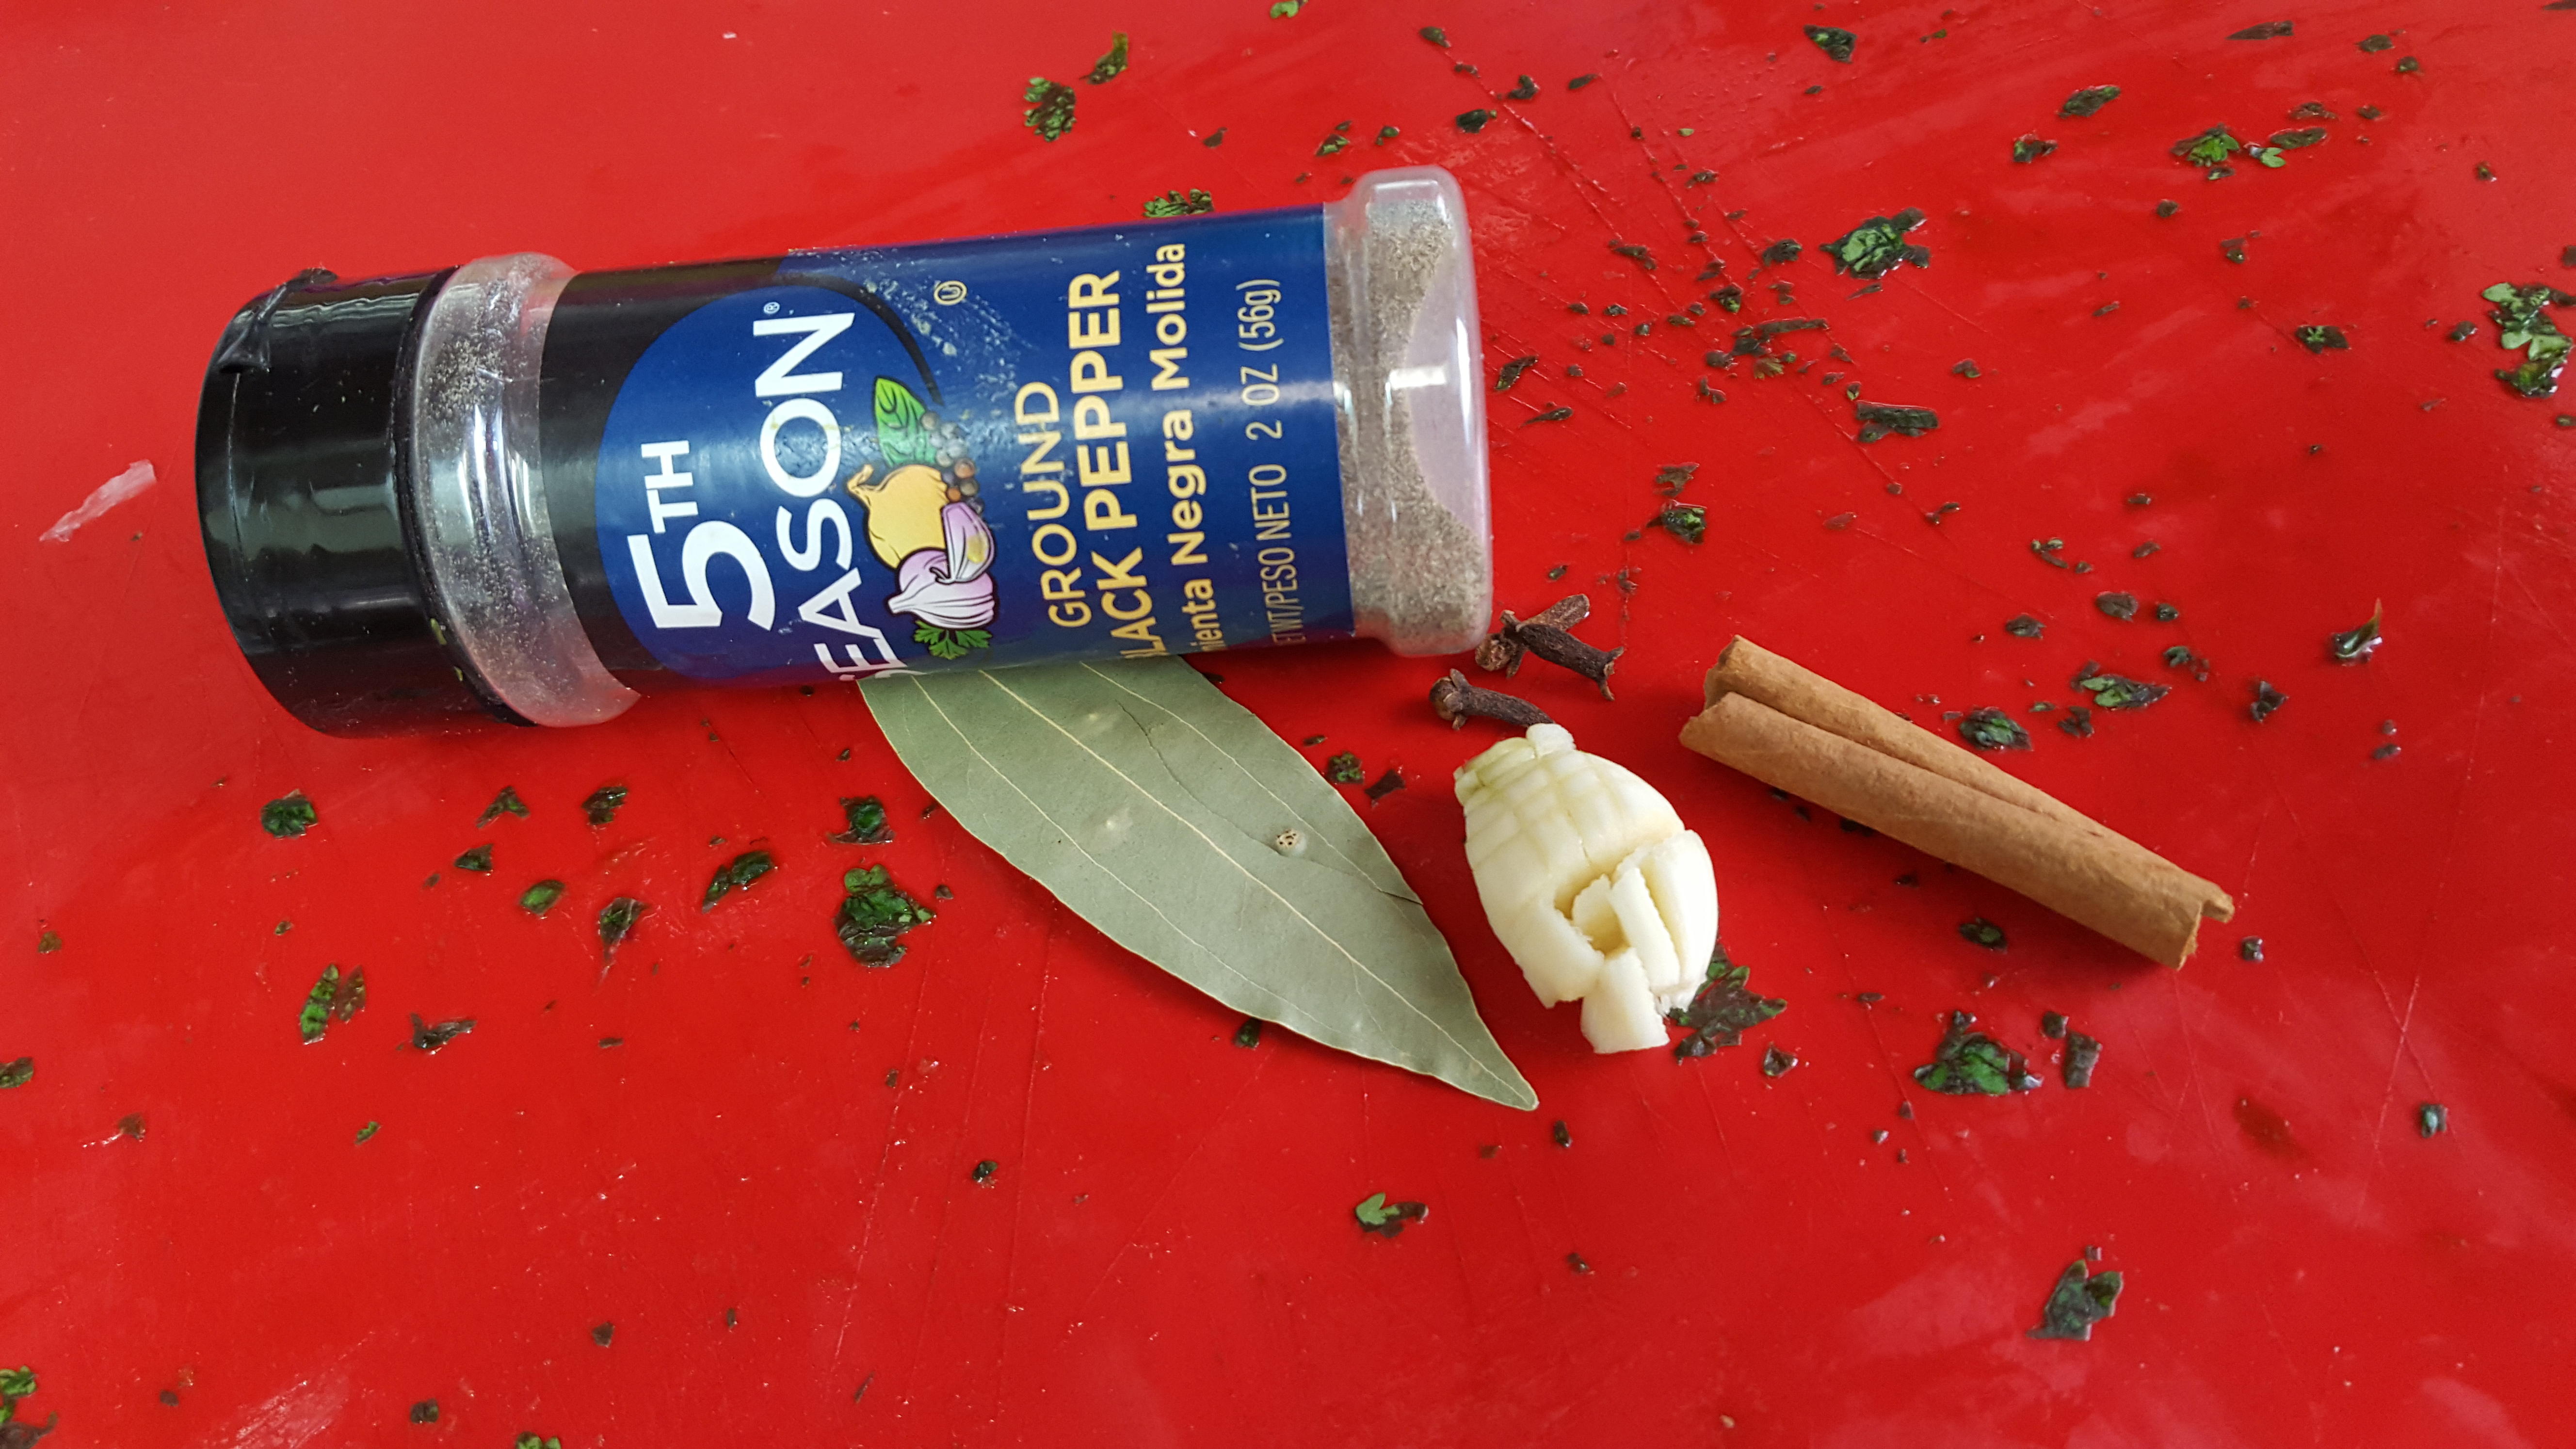
4. Prepare the spices – hand grind them fresh: black pepper, bay leaf, garlic (quantity as per taste), cinnamon stick, cloves.
5. Sift the ground spices
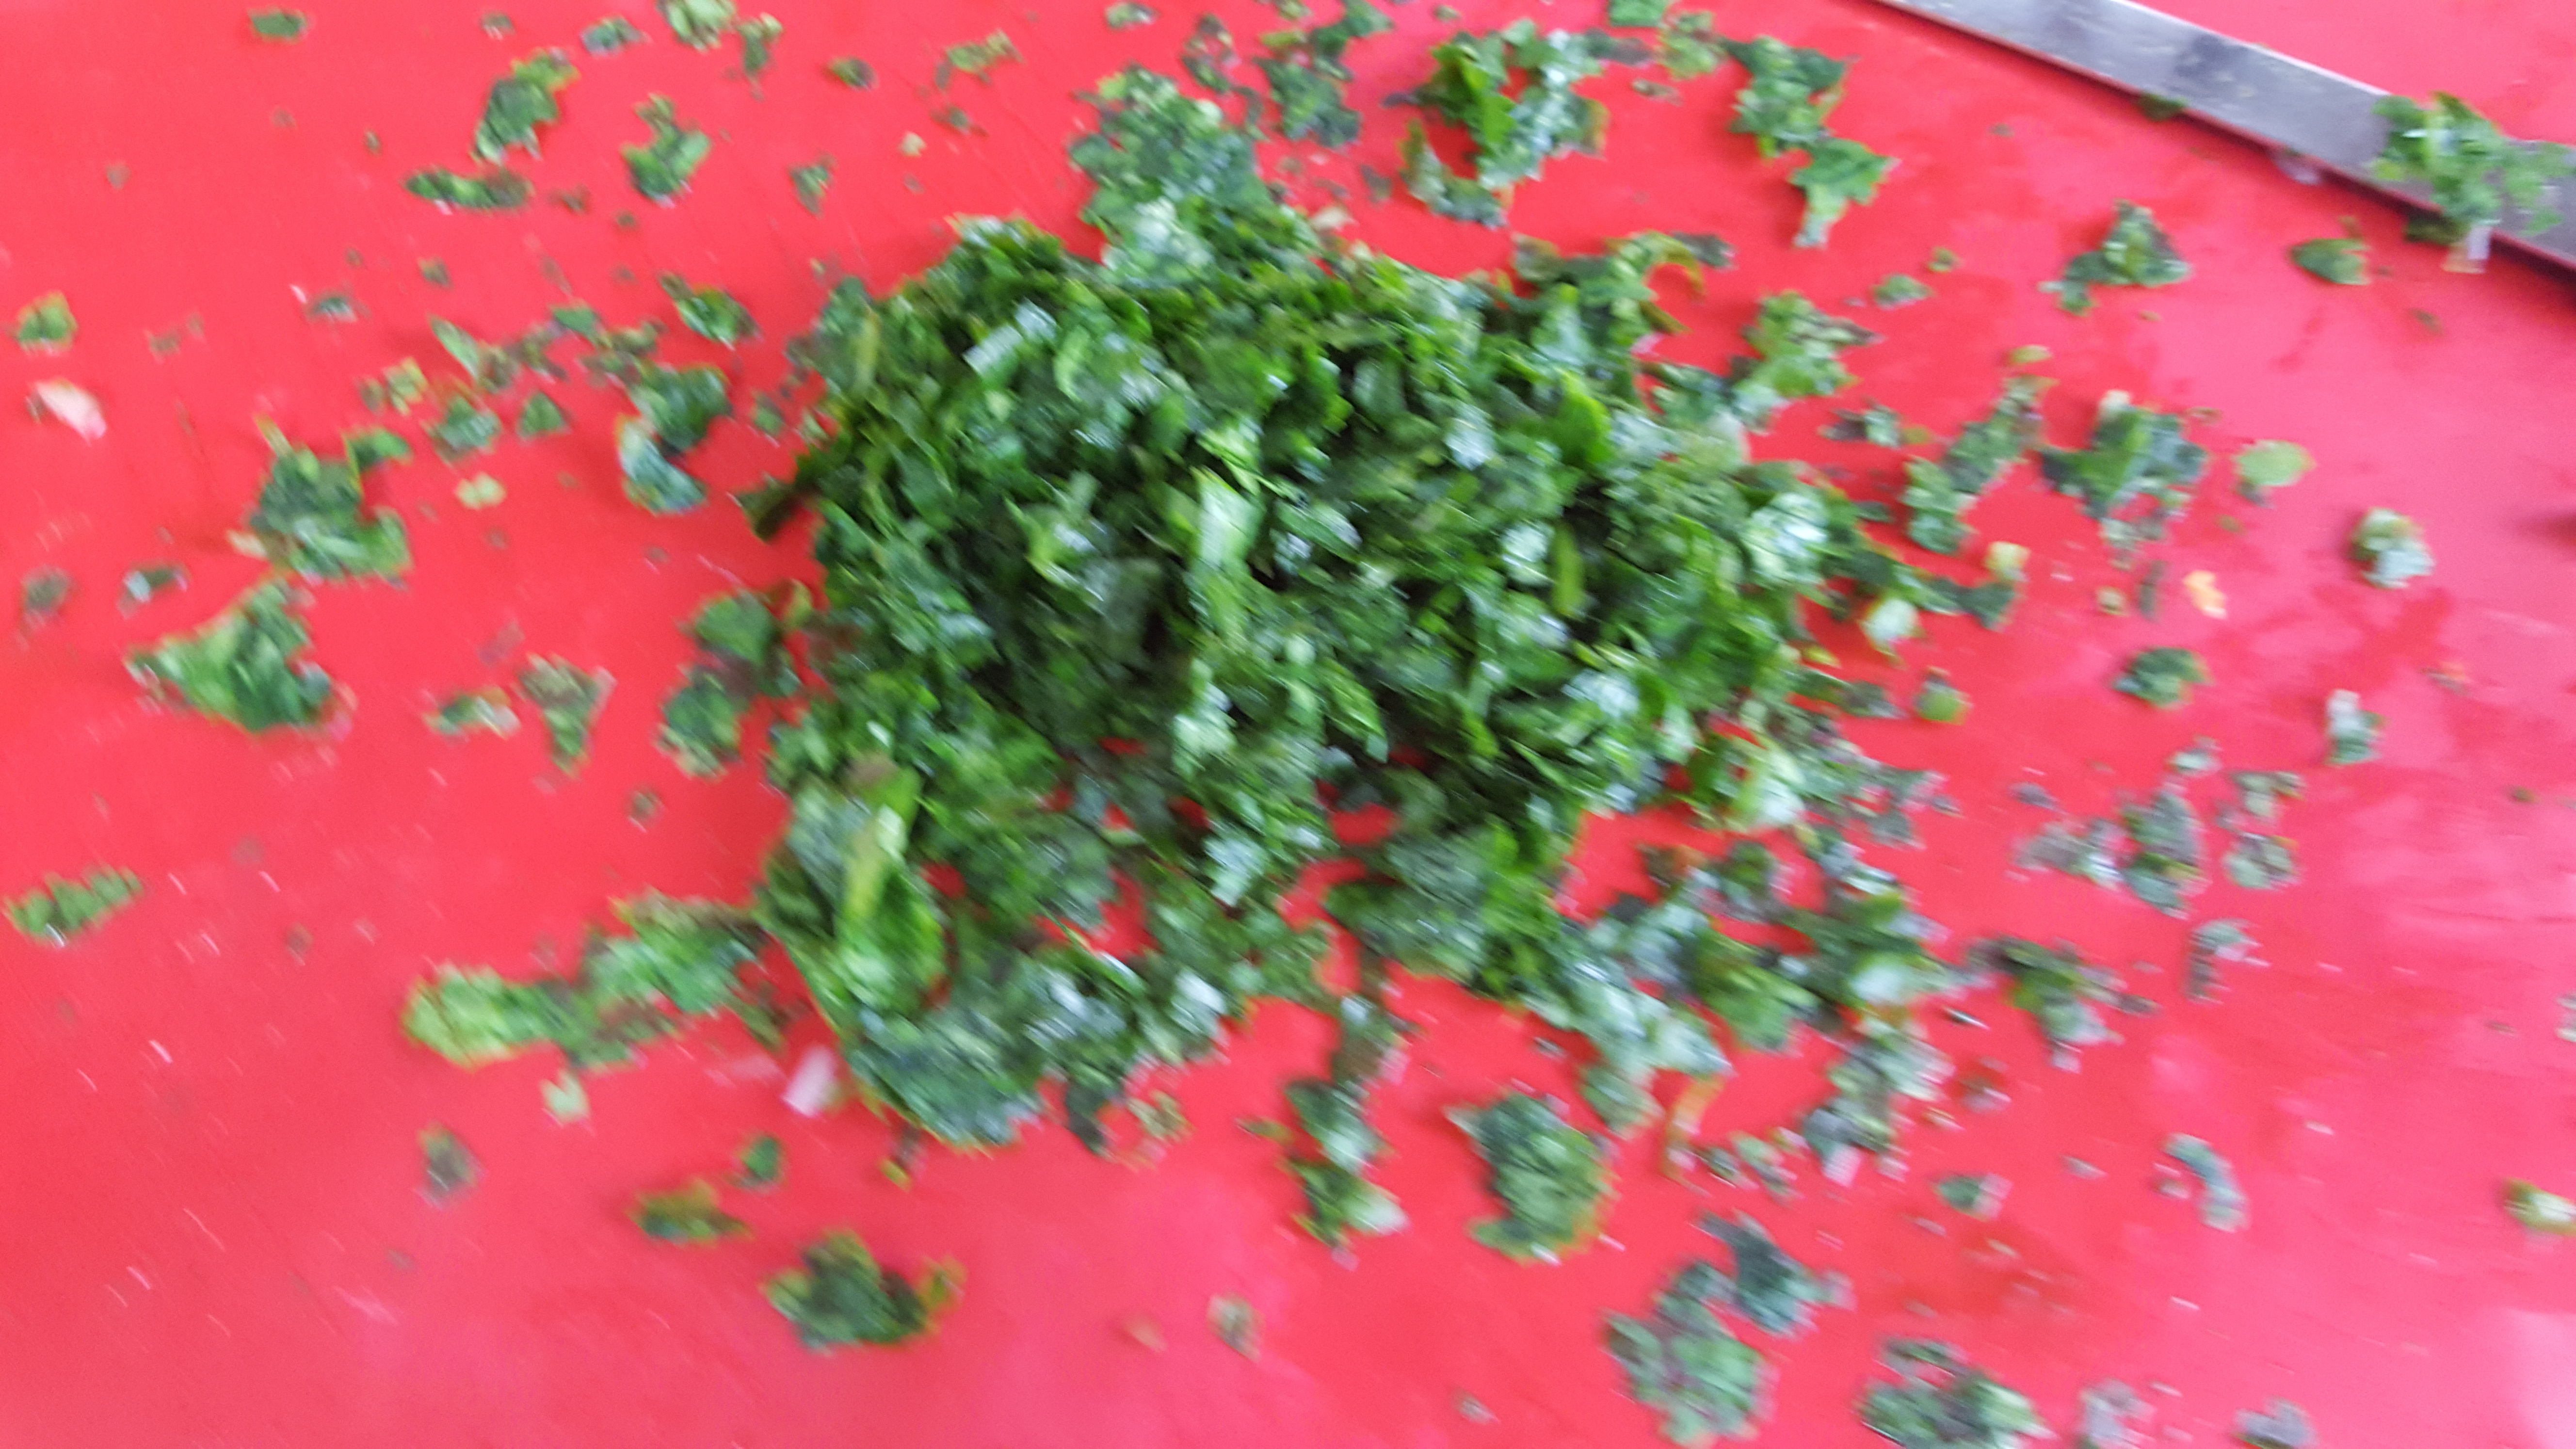
6. Chop cilantro and add it to the onions. Reduce heat to medium or low.
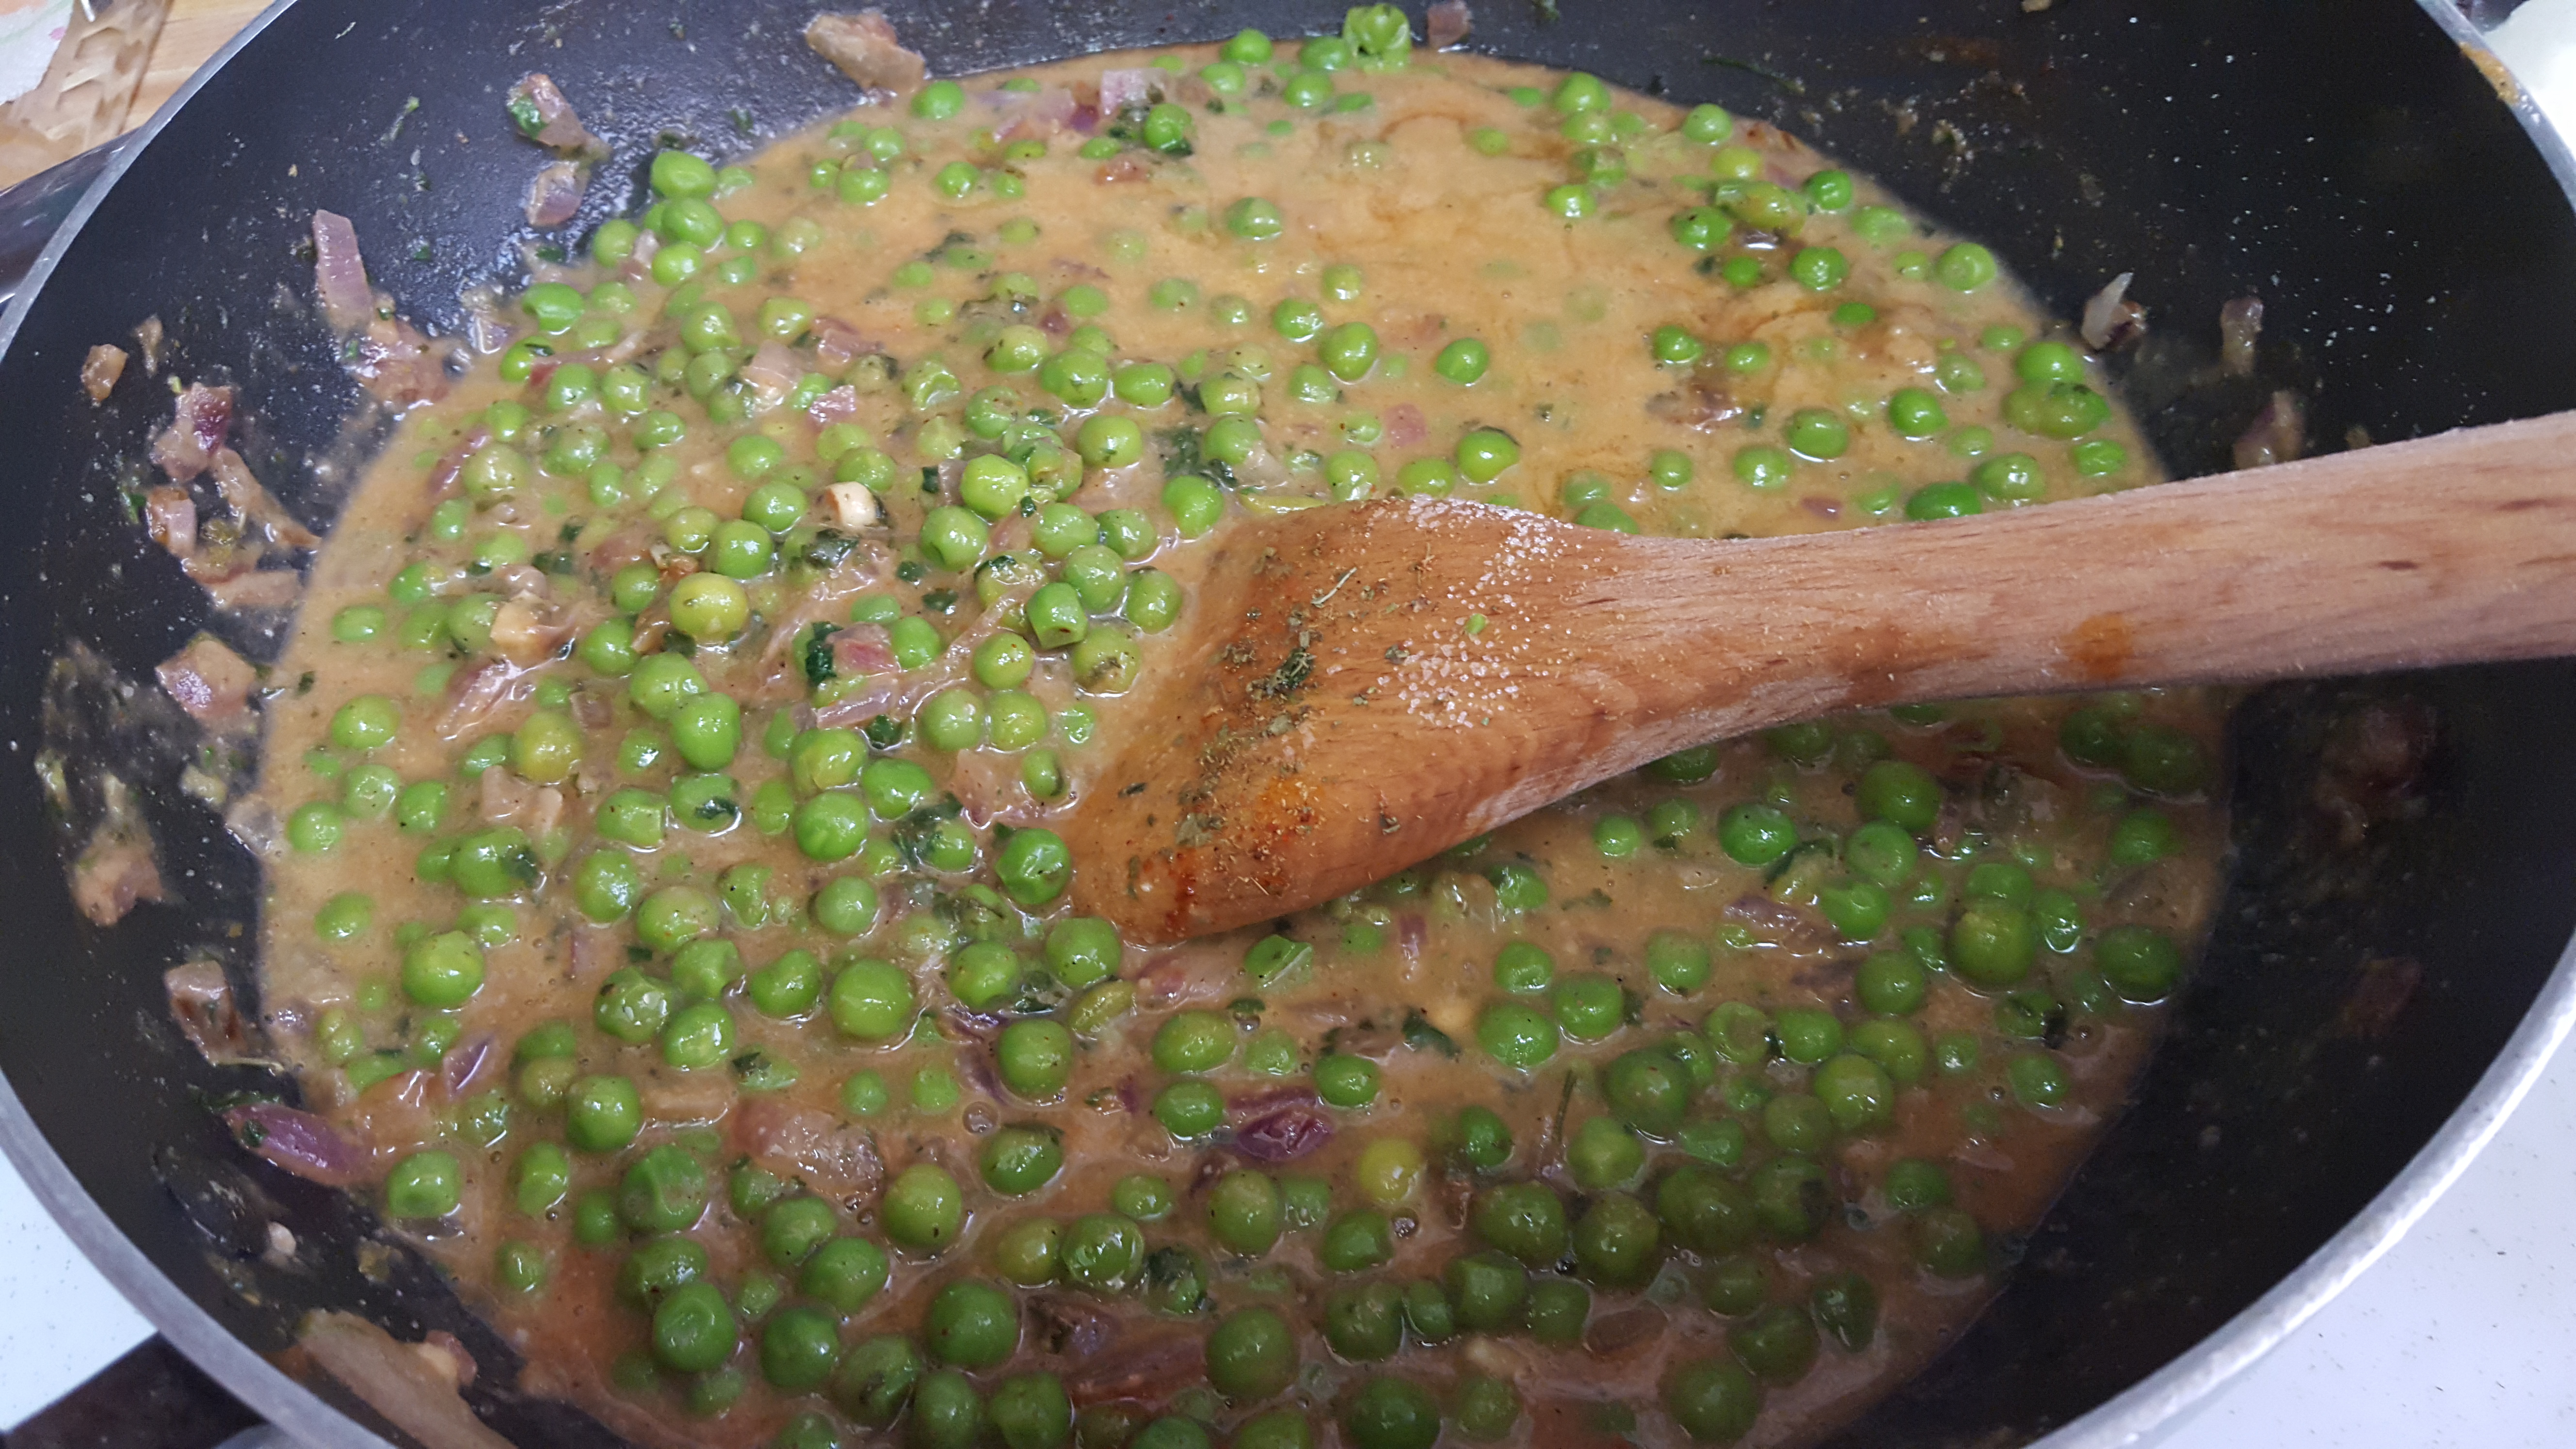
7. Ground dry almonds and cashews into a semi-coarse or fine powder. Salted nuts are preferred.
8. Add the ground powder to the onions. Add home-made or bought tomato paste. Add the ground spices. Add water to make a semi-thick paste. Add red chili powder if needed. Strain boiled green peas and add to this mixture. Simmer on medium for few minutes to allow for the flavors to mix well.
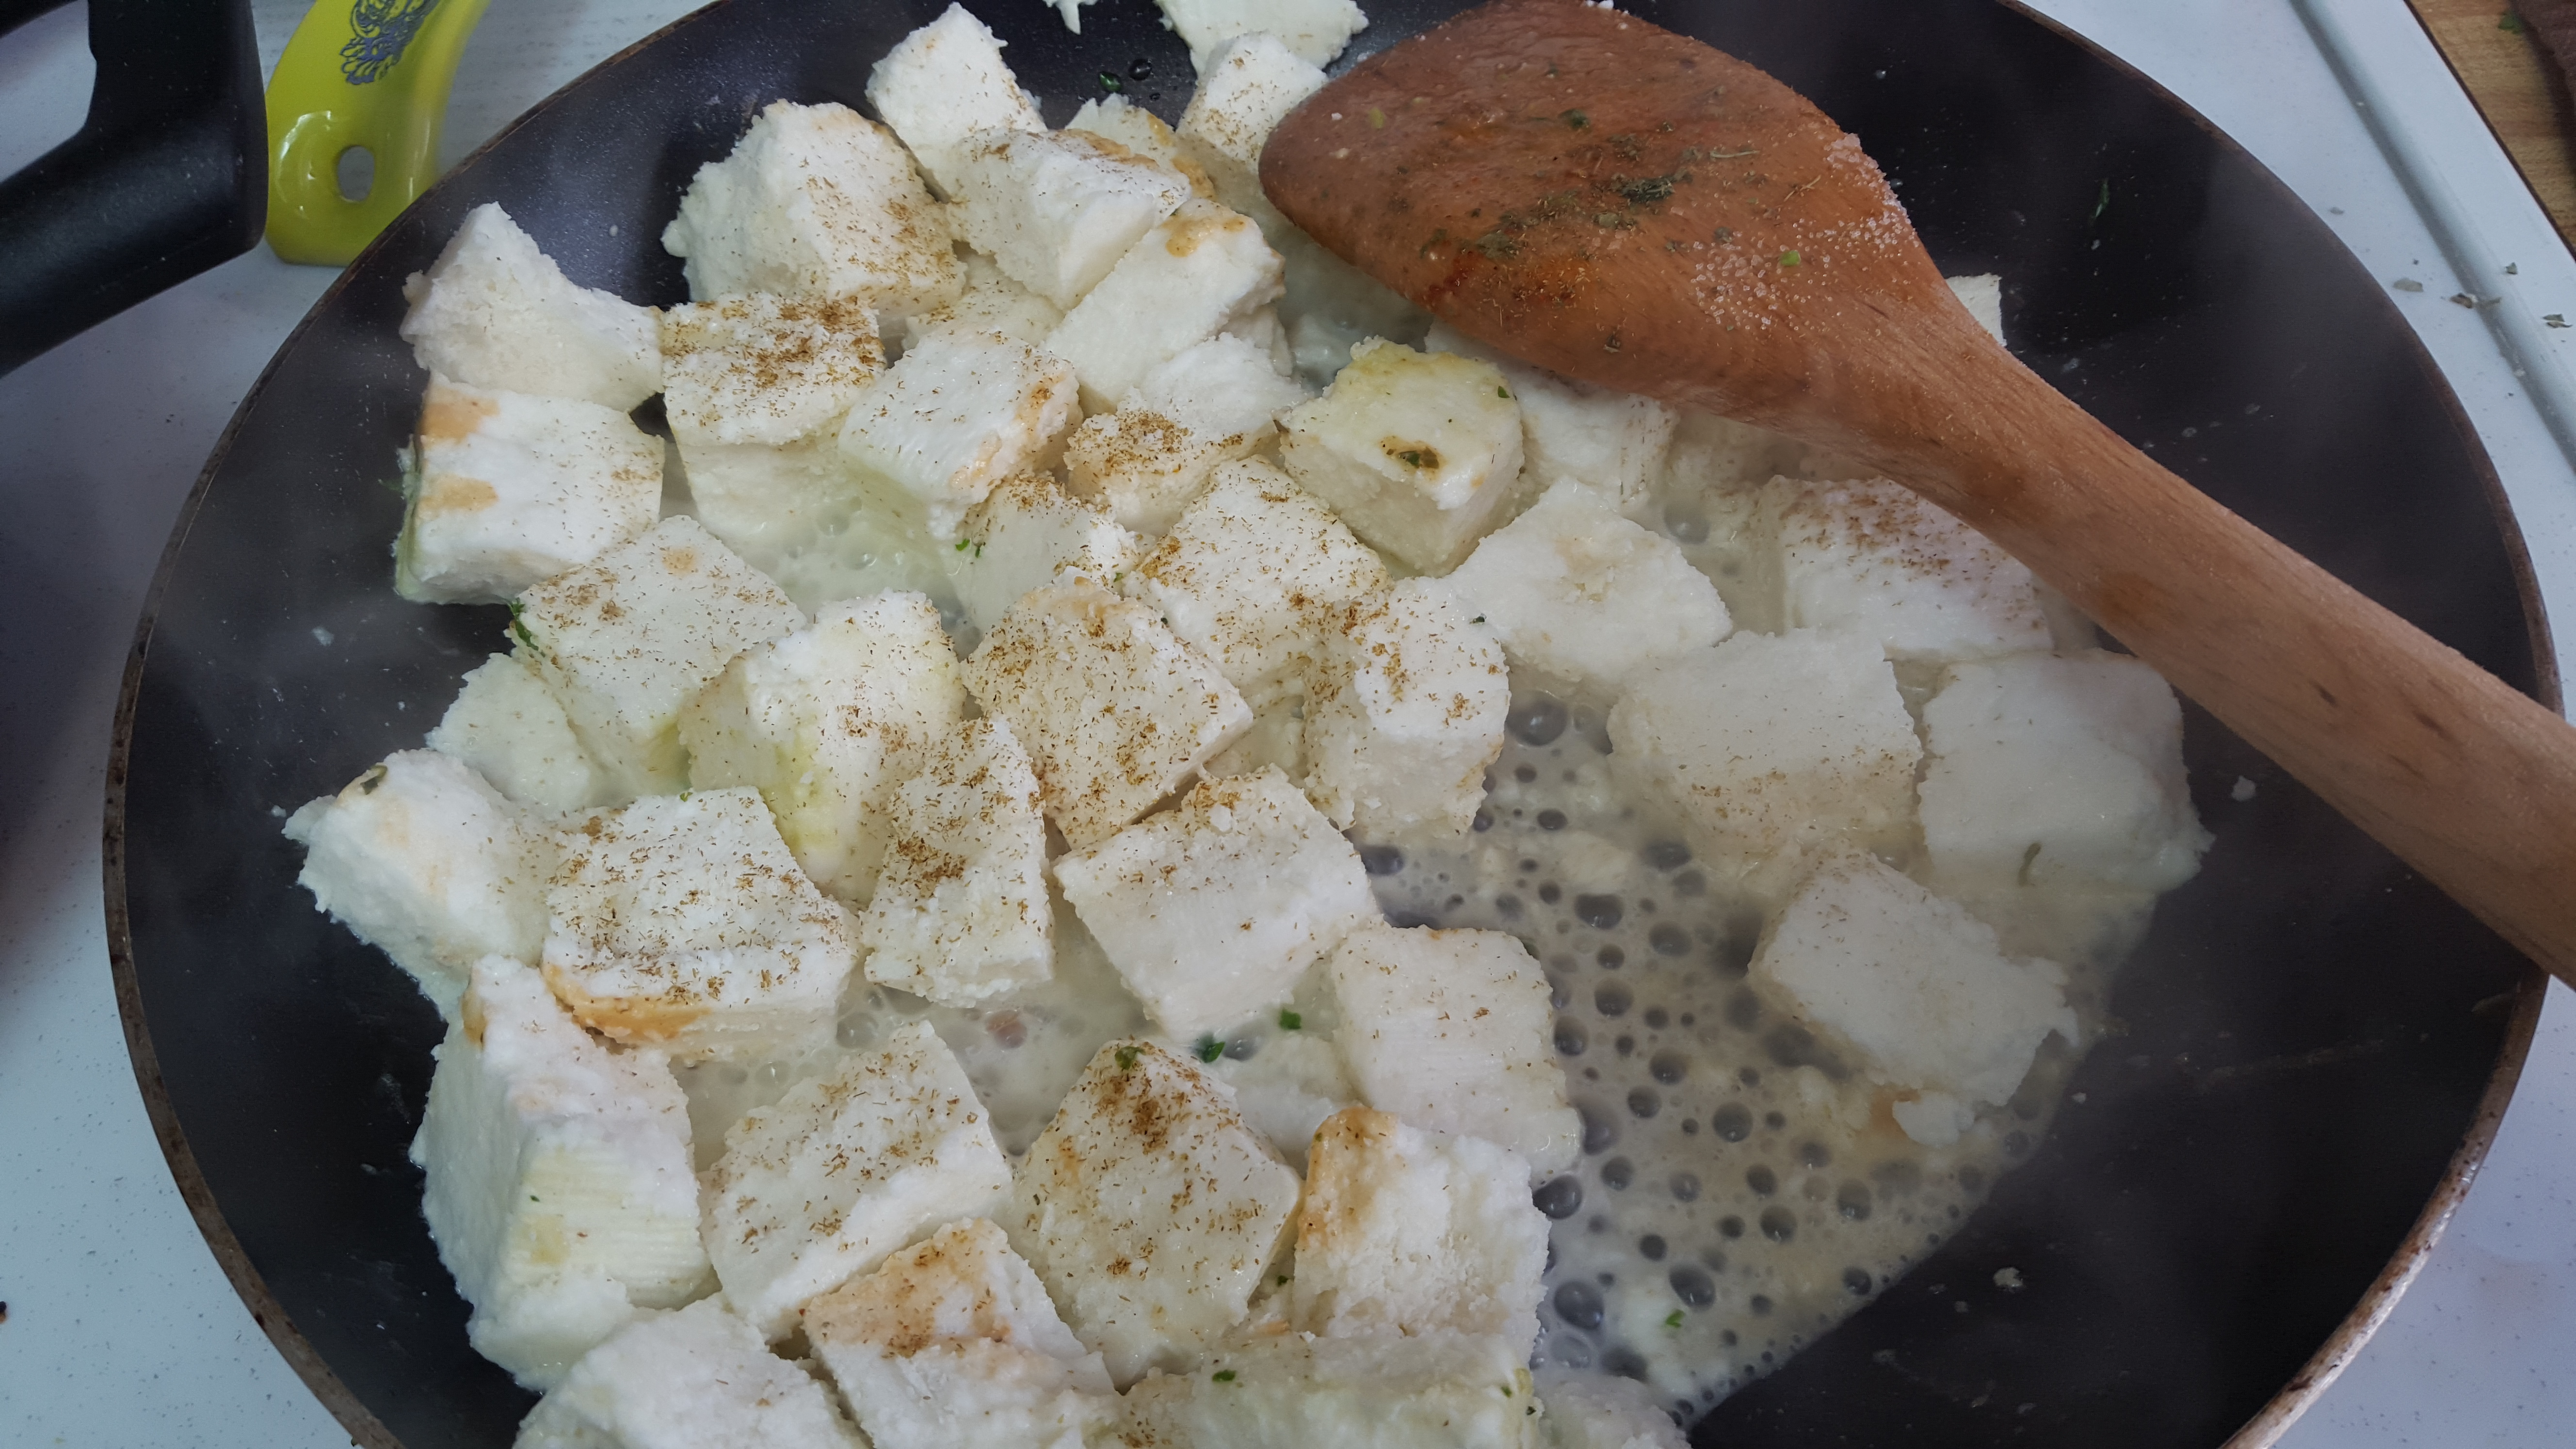
9. Prepare the Paneer: Open the defrosted pack; cut into cubes of desired size for eating. Add oil or butter to a wide skillet and add cubes to saute. Sprinkle salt and black pepper or cinnamon powder on the paneer for absorption of flavor. May take anywhere from 7 – 15 mins. (on medium to low flame) – depends on the type of stove and skillet. Lightly toss and move frequently with a soft spatula. The water or foam will eventually evaporate. Alternatively, you can make your paneer at home by boiling milk and tearing it with tartness from fresh lemon juice or vinegar. There are many online recipes for the same.
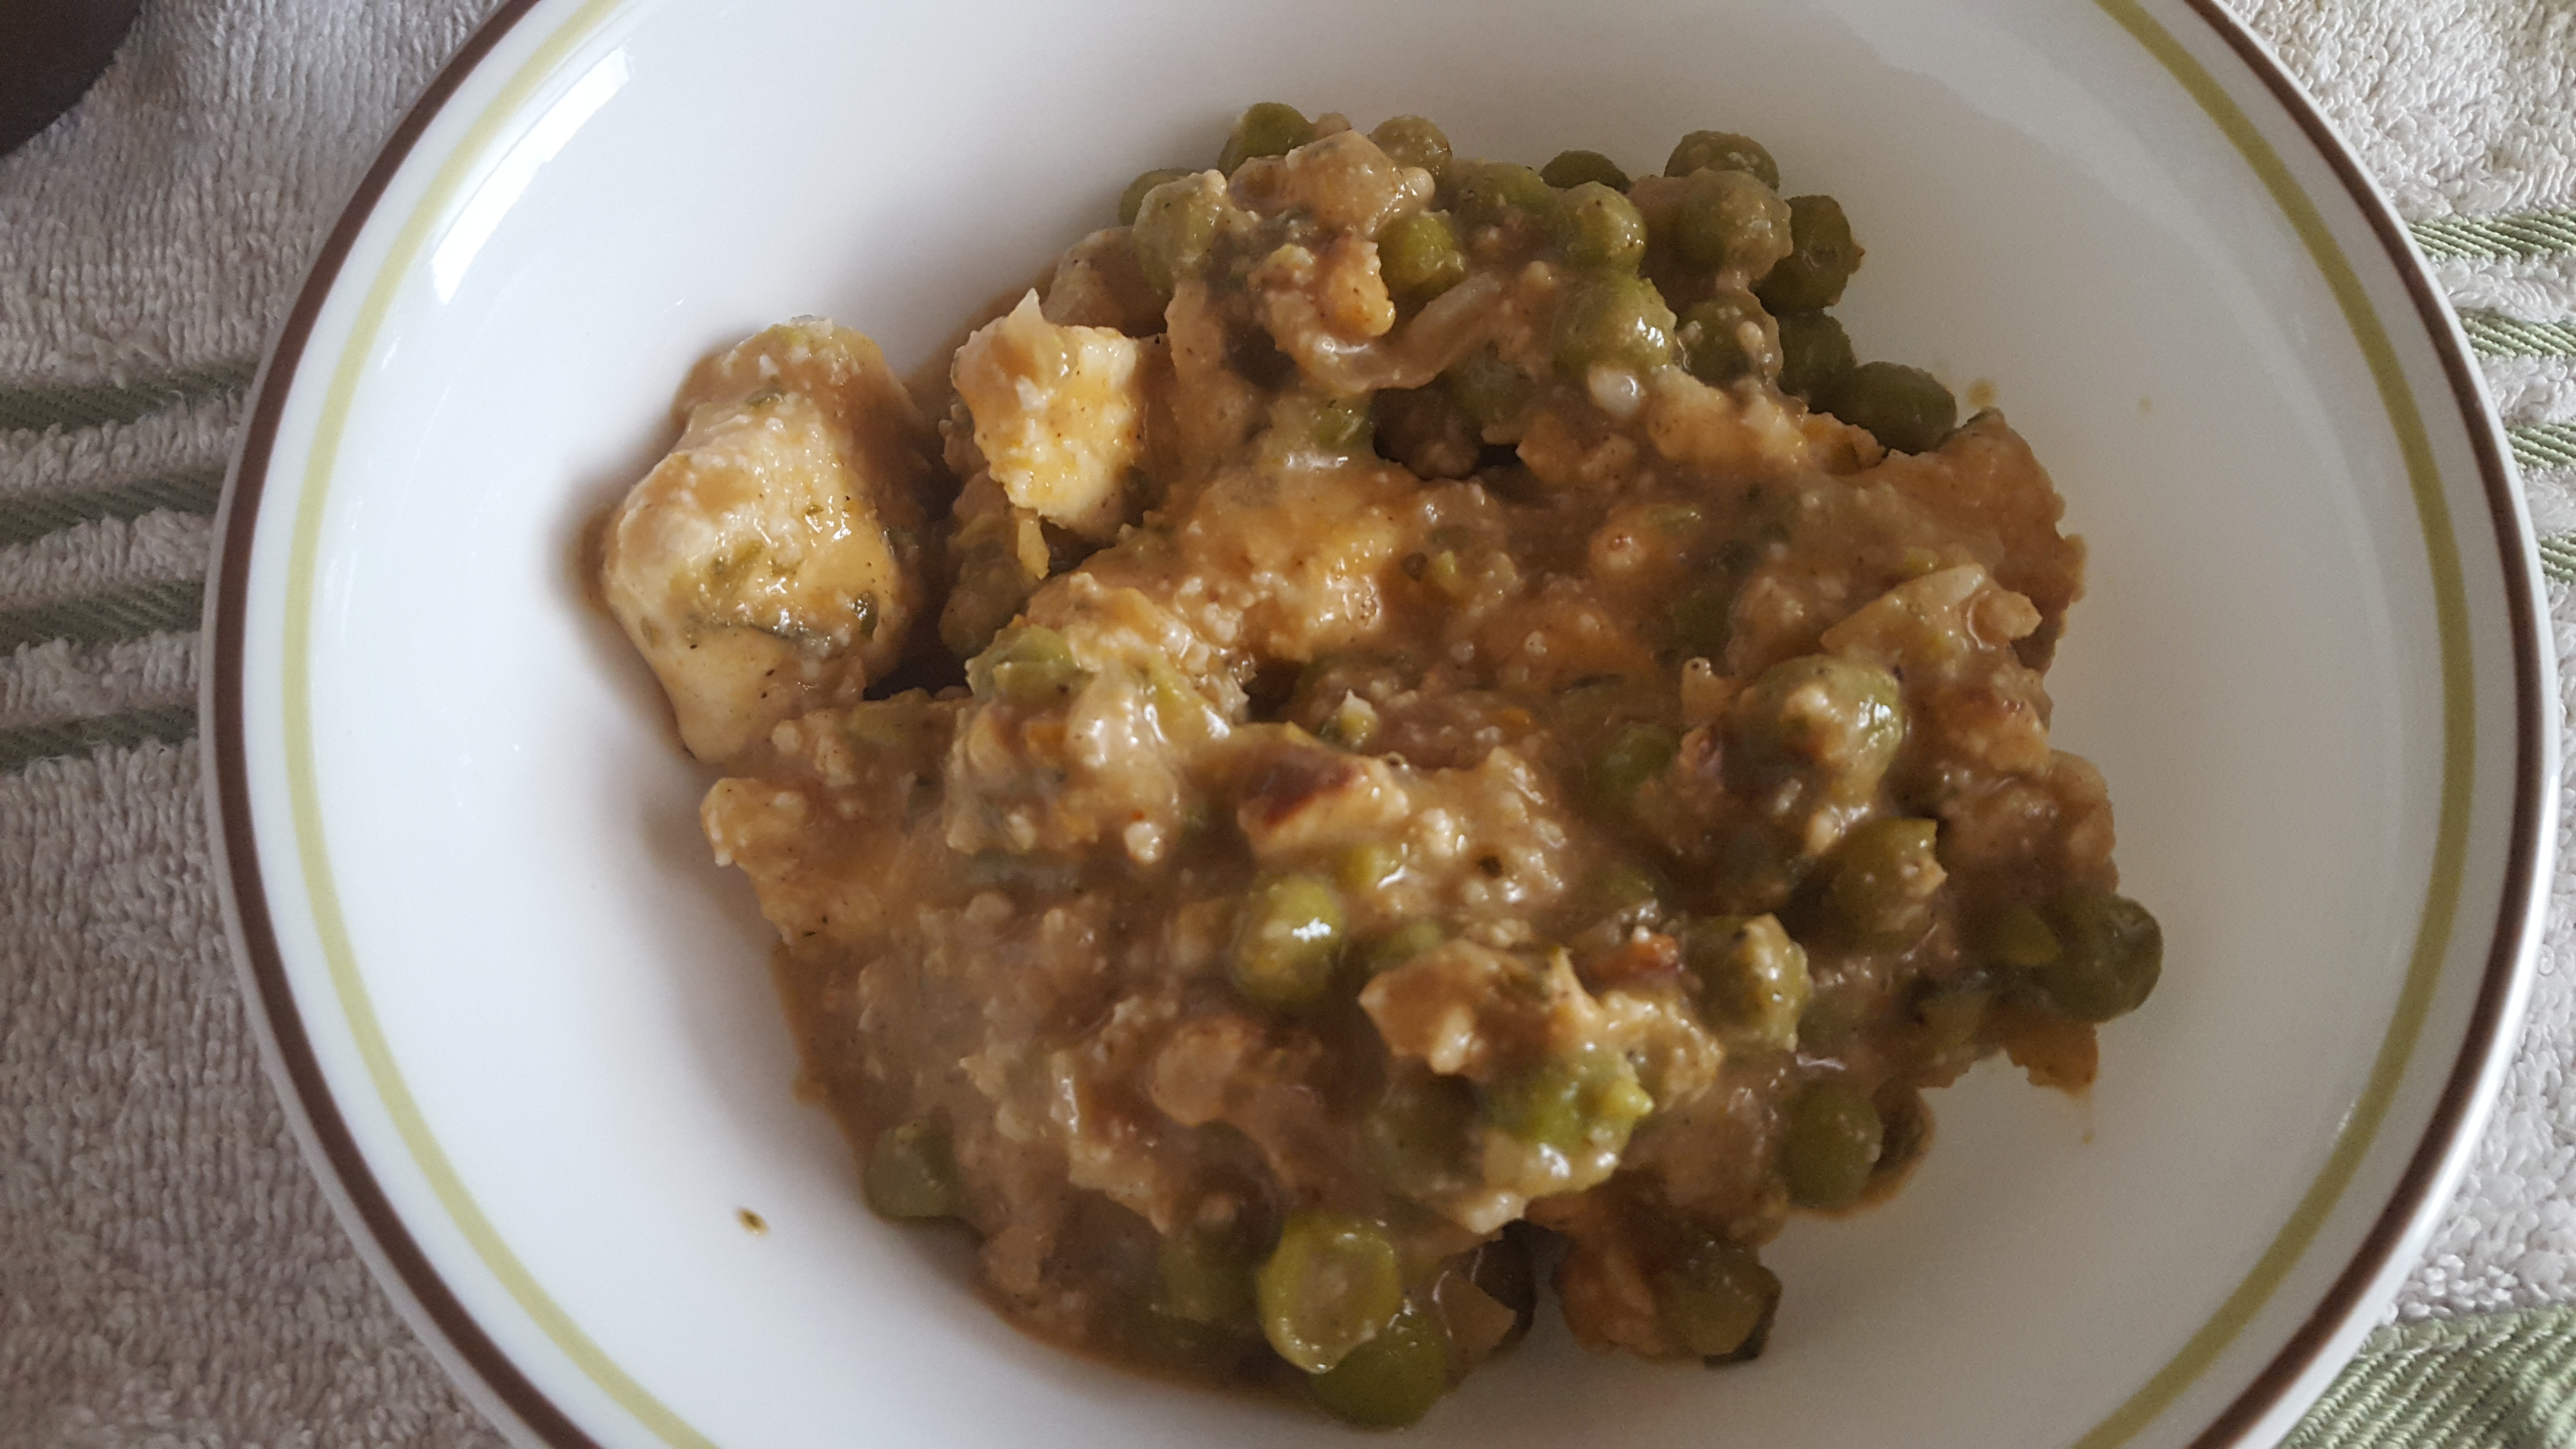
10. Remove the paneer when: it is light brown on either or both sides, slightly crispy and most water has evaporated. Then add paneer to the gravy. Sprinkle cilantro on top if you wish for more color and flavor.
11. Serve hot with Indian Tortillas (Roti) or plain rice. I use masoori or basmati rice.
I have re-published this article at: http://www.mycity4kids.com/parenting/parenting-booth/article/matar-paneer-veg-high-protein-fresh-cheese-and-peas
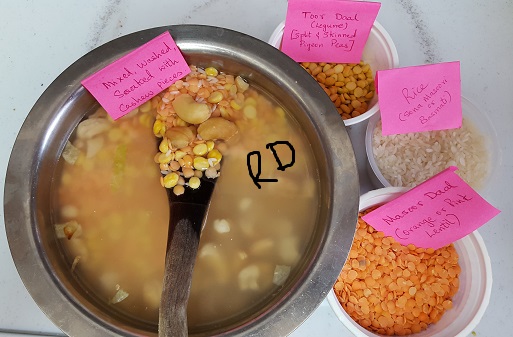
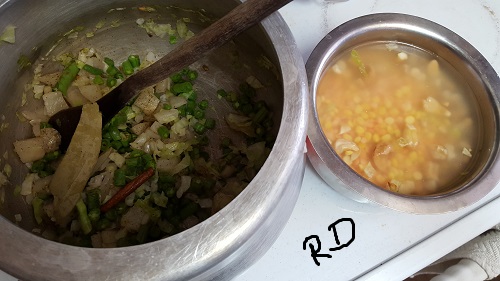
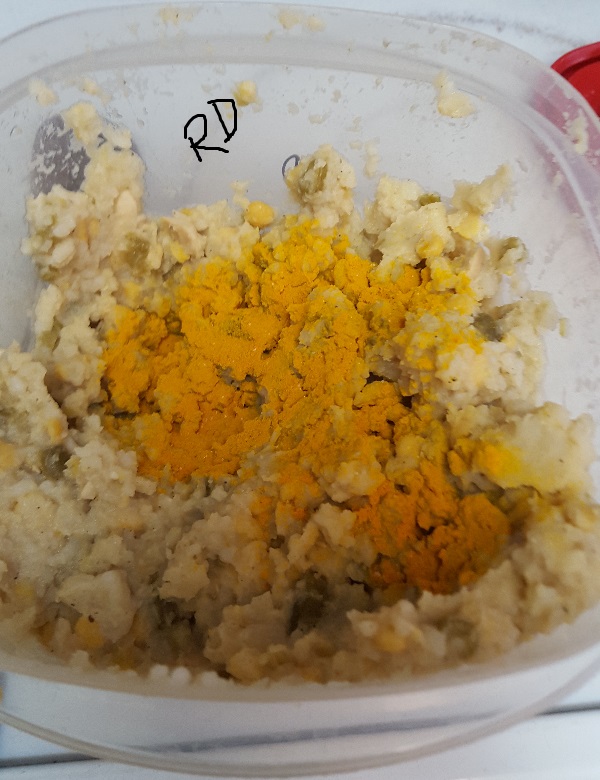
Khicdi is a mix of rice and legumes. I add as many veggies I can to make it a wholesome dish. The spices and herbs you see in the dish have great health benefits. The dish by itself is Vegan. Tastes best with Yogurt on the side or mixed into it but I am a Vegan so I do not use Yogurt. I eat it with Soup, a curry, or just by itself.
This is a Gujurati Dish. I am a Gujurati, belonging to a West Indian state called Gujurat. Rice and Daal (Legumes, lentils, pulses) are our staple food and part of almost every or every other meal.
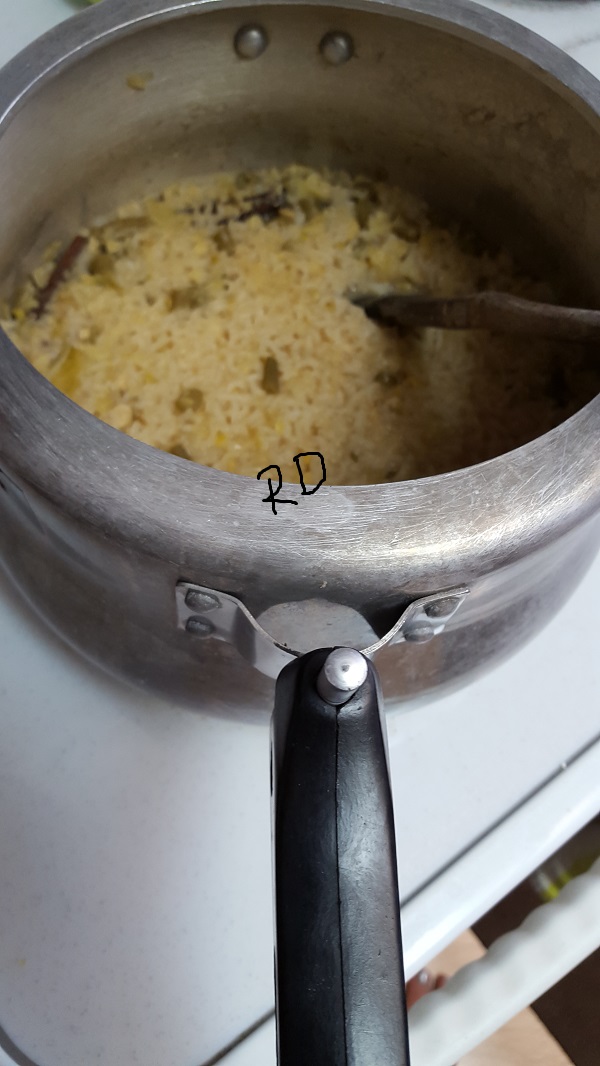
Add Salt as needed
4-5 whistles in the pressure cooker.
This High Protein Dish is ready to eat. Tastes best with Yogurt or Indian Kadhi.
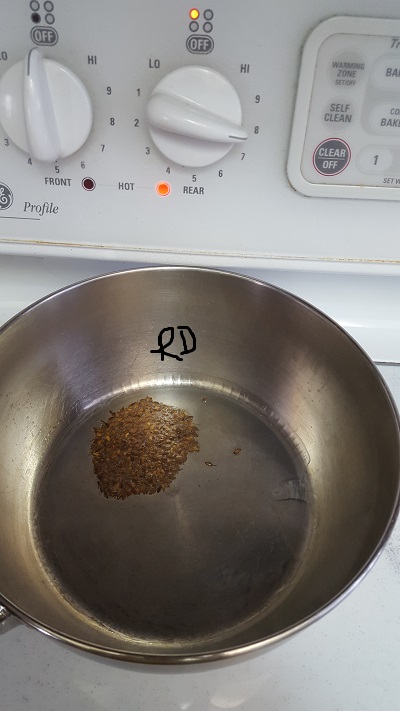
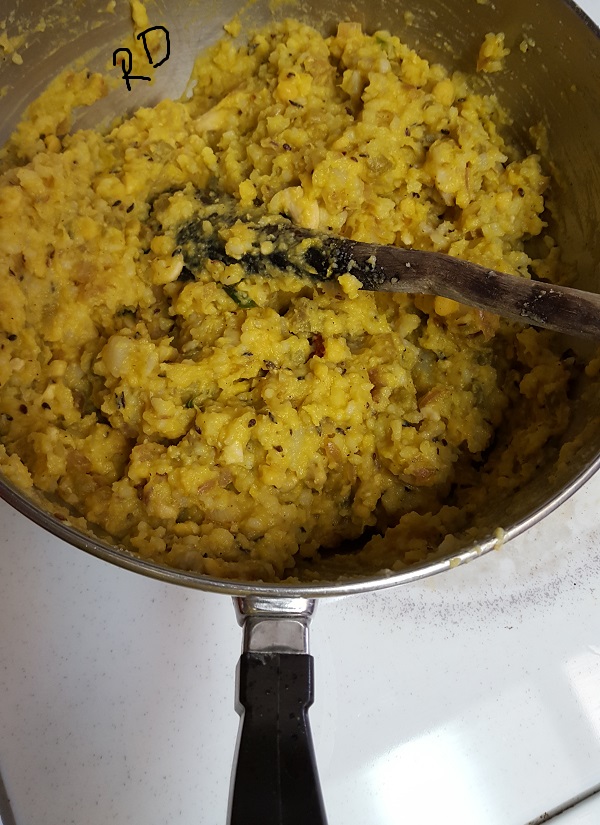
Alternatively, we can shallow fry the khicdi for an added taste. This procedure lifts the taste to a totally new level.
Oil – 1 Tbsp
Cumin Seeds – 1 tsp.
while the seeds burst, take the rice and add asafoetida (hing) 2 pinches and turmeric powder 1/2 tsp.
Asafoetida helps digestion and prevents gas or bloating from the legume
Turmeric is an antibiotic and has several health benefits.
READY!!
Top with Cilantro to add color, flavor – I was out of Cilantro!
This recipe comes from Public Request. Many of you have requested this, so here it is. Email me or write to me here with any questions. For the base, I follow a certain recipe, I have posted the link below and then I re-form it my style. I have shared sweet with many friends from different cultures – Indian, American, Other Asians and luckily this sweet has everyone’s smiles and thumbs up!
Follow this link to make your peda and then follow my add-ons below to make it so much more delicious!!!