Today I am sharing a very quick, easy smoothie recipe for you. It is perfect for anyone who needs to have more nutrition run down their gut; and can be used for those allergic to dairy. You may use dairy or non-dairy milk for this smoothie. Make it a part of your daily snack, breakfast or be a charming host.If your kids are anything like mine, ‘fuzzy’ is a word often used. She is a typical ‘vat’ personality – dislikes eating, lazy to chew, rather play than eat! While I worry about her nutritional needs being met, it also helps me get creative.
This smoothie was such a creative attempt. I just took whatever came to my mind, put them all together and ‘churn’ went the grinder. In just a few minutes, we had a ‘Happy Mom’, a ‘Healthy Snack’ and a clean kitchen.
MAKES: 2.5 regular sized glasses
INGREDIENTS:
Orange – one medium size
Banana – one medium size
Rice Milk – 1.5 glasses filled to the top or Milk or Soy Milk
Ice – a few cubes
Sugar – 1 Tbsp
Elaichi (Cardamom) – 1 small pod. You can use half if you want a milder flavor
HOW TO:
Mix it all
Churn
Pour
Drink
OPTIONAL: You may strain it in a big strainer for extremely fuzzy kids, to remove the orange fibers. You may also use any milk – dairy, rice or soy. I used Rice milk and that is the best I can vouch for in terms of taste and consistency! It was gone in seconds, we all loved it!
VARIATION 1:
Watermelon
Banana
Rice milk
Sugar
Elaichi
Mix, churn, strain, pour, enjoy!
VARIATION 2:
Grapefruit
Orange
Rice milk
Sugar
Vanilla extract – 1/6th tsp
Mix, churn, strain, pour, enjoy!
I hope this has given a quick breakfast or snack option for yourself and your kids. It is filling, energizing and absolutely lip smacking! More so, your kids can easily make this with you and it can be a great add on for your parties!
Prep. + cooking time is just 10 mins! Early morning nuisances is a Ghar Ghar ki Kahani. “Jaldi Khao!” Well, this recipe is for that naughty rebellion, the slow eater or the typical kid who eats with his eyes.
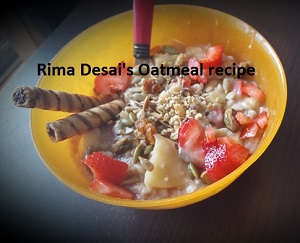
I enjoy oats thoroughly. I use them in several ways and here is a recipe inspired by my fruit cravings and allergy to milk. I love fruits, nuts and oats but never before have I thought of putting them together in such an amazing way. Since I am the mom who is always on the go, with a long list of things to do daily, I need something quick for ME in not my daughter ;) I am also a VEGAN, SOY and ALMOND allergic, so this recipe is perfect for my sweet tongue and early morning starve!
Makes for Kids 3 years +
Makes a great taste for the Adult Kid too ;)
The best part of this recipe is that it is very flexible. You can modify your choice of fruits, seeds and nuts or leave them out. You can cut them smaller for toddlers and add more sugar if needed. Also, since this recipe has Banana, serve it immediately or add all fruits just before serving. You can keep them chopped and stored separately for later use.
I took OLD FASHIONED QUARKER OATS here but you could take Instant Quarker Oats if needed.
Since this is for 2 to 3 kids, you can reduce or increase the quantity of each item as needed. Half an apple, half a big banana, 7 medium strawberries, 1.5 Tbsp. of sunflower + pumpkin seeds, 1.5 Tbsp. of Pistachios, 2 rolled wafers (optional) and 1/4 Tbsp of Sugar. Add RAISINS and CRANBERRIES if your kids like them :)
COOK AND PREP.
Oatmeal in the hot water for 8 – 10 minutes (as you usually cook oatmeal). Add the raisins and cranberries from the start (when the water is getting heated). While the oats are cooking, chop your fruits fine or medium sized. Once the oats are cooked, switch off stove, add the fruits you desire. You can add apricots for kids who need more iron or any (non-sour) fruits of their choice.
Add the nuts, seeds and sugar as per your choice. Almonds, walnuts, cashew halves, etc. . Add the rolled wafers if you are ok with it (once in a while) and you are good to go! This is a HEAVY MEAL. It is highly satiating, nutritious, filled with carbs, proteins, vitamins and minerals, perfect for breakfast and on the go moms.
Add milk if desired but I would not recommend it given the mix of fruits. This recipe requires very less sugar because banana, apple and raisins made it sweet. 1/4th Tbsp of sugar per child is a great breakfast. Cereals typically have a LOT more sugar than that.
Prep. + cooking time is just 10 mins! Early morning nuisances is a Ghar Ghar ki Kahani. “Jaldi Khao!” Well, this recipe is for that naughty rebellion, the slow eater or the typical kid who eats with his eyes.
I enjoy oats thoroughly. I use them in several ways and here is a recipe inspired by my fruit cravings and allergy to milk. I love fruits, nuts and oats but never before have I thought of putting them together in such an amazing way. Since I am the mom who is always on the go, with a long list of things to do daily, I need something quick for ME in not my daughter ;) I am also a VEGAN, SOY and ALMOND allergic, so this recipe is perfect for my sweet tongue and early morning starve!
Makes for Kids 3 years +
Makes a great taste for the Adult Kid too ;)
The best part of this recipe is that it is very flexible. You can modify your choice of fruits, seeds and nuts or leave them out. You can cut them smaller for toddlers and add more sugar if needed. Also, since this recipe has Banana, serve it immediately or add all fruits just before serving. You can keep them chopped and stored separately for later use.
I took OLD FASHIONED QUARKER OATS here but you could take Instant Quarker Oats if needed.
Since this is for 2 to 3 kids, you can reduce or increase the quantity of each item as needed. Half an apple, half a big banana, 7 medium strawberries, 1.5 Tbsp. of sunflower + pumpkin seeds, 1.5 Tbsp. of Pistachios, 2 rolled wafers (optional) and 1/4 Tbsp of Sugar. Add RAISINS and CRANBERRIES if your kids like them :)
COOK AND PREP.
Oatmeal in the hot water for 8 – 10 minutes (as you usually cook oatmeal). Add the raisins and cranberries from the start (when the water is getting heated). While the oats are cooking, chop your fruits fine or medium sized. Once the oats are cooked, switch off stove, add the fruits you desire. You can add apricots for kids who need more iron or any (non-sour) fruits of their choice.
Add the nuts, seeds and sugar as per your choice. Almonds, walnuts, cashew halves, etc. . Add the rolled wafers if you are ok with it (once in a while) and you are good to go! This is a HEAVY MEAL. It is highly satiating, nutritious, filled with carbs, proteins, vitamins and minerals, perfect for breakfast and on the go moms.
Add milk if desired but I would not recommend it given the mix of fruits. This recipe requires very less sugar because banana, apple and raisins made it sweet. 1/4th Tbsp of sugar per child is a great breakfast. Cereals typically have a LOT more sugar than that.
There are tons of eggless cake recipes online but there is one major problem with many of them – They are not uniform, different recipes can have so many different methods and ingredients that it can make us wonder which one to experiment. Trial and error is something I don’t enjoy while making cakes. Cakes don’t happen in a snip and a snap! My friends love my cakes. They are soft, eggless, not too sugary and are easy to make.
Many of those online recipes don’t give us the fluffly, airy, non-greasy texture we want our cakes to have. I am grateful to my sister’s recipe book with me which has helped me bake the cakes that my family and daughter adores. What can be a better expression than – “Mom I don’t want to eat any other cake. Your cakes are the best!”
I must admit, I am no pro with icing and I just do what I can manage best with. I am ready for a professional class for that but you can still use this recipe for a great sponge cake covered with grated chocolate, coconut flakes and basic icing. There is lot more to baking a cake perfectly and I don’t find myself having the space to list all of those small techniques here. But this basic recipe should get you started right away!
PREPARATION TIME: 20 to 30 mins.
COOKING TIME: 40 to 45 mins.
INGREDIENTS:
Prepare the baking molds by first layering a thin slice of butter, then sprinkle 2 to 3 Tbps of flour and spread it all around by turning the mold in all directions, ensuring the flour has spread to all sides. Alternatively, you can use parchment paper and thin layer of flour over it. Place the mold on a flat, room temperature surface and then, pour the smooth batter gently into the mold without touching it.
Maida (Bleached or unbleached wheat flour) or Self Raising Flour = 125
Condense Milk – 200gms or half tin
Butter, Ghee or Oil (Liquid form) – 60ml
Soda Water / Coke – 100 to 120ml
Vanilla essence or any essence of choice – 1tsp
Cocoa Powder – 1 Tbsp (Don’t add if making Vanilla Cake)
Drinking Choc – 11/2 Tbsp
Soad Bicarb (Edible Soda) – 3/4tsp
Baking Powder – 3/4 tsp
Chopped Nuts if you want – 1 to 2 Tbsps
METHOD:
Prep and Preheat the Oven to 325 degrees F. Mix all the Wet and all the Dry Ingredients in separate bowls. Sieve all the dry ingredients in a large (deep and wide) bowl. Sieving will help to smooth and remove any lumps. Slowly pour the wet ingredients over the dry ingredients and continue to mix them, stir them slowly with a hand whisk or spatula in ONE DIRECTION. Keeping the same direction ensures bubbles are formed and they remain (break if you change the direction). Mix all the wet and dry ingredients in a swift motion with a hand spatula or at the slowest speed with the machine whisk for 5 to 7 minutes (feels smooth, silky). Wear safety oven mittens and place the cake in the center of the oven safely. Close oven door, turn on oven light if you have that feature. Place a 25 minutes timer.
Bake in oven at 325 degrees for 25 to 50 minutes depending on the oven size, type and the quantity of batter.
WHEN TO KNOW IF IT’S READY: Do not open the oven in the midst of baking. That will release air bubbles built to rise the cake. In stead look at the cake from outside and see if the cake looks like it is rising and turning more brown. Ideally, the fragrance will tell you when it is baked. A strong, cake fragrance should fill the room. To check if baked fully, open the over door at 25 to 30 mins. and while wearing safety mittens, prick a toothpick (not knife) in the center of the cake or at 2-3 different places of the cake. If the toothpick comes out clean with no batter or sticky residue, then the cake is ready.
Place the cake in a cool, not heated area over a steel, metal wire frame to allow air to pass through the bottom and the top of the cake mold. Do not attempt to remove from the mold until it is completely cool.
This cake is a 3 layered cake with fondant on top of all the layer. I baked it for my daughter’s 4th Birthday along with purple icing cupcakes. The same recipe for cupcakes! You can see in the picture that the cherries were gone first!! L-O-L. The fondant layer should be thinner than the one in this picture.
I will be uploading later, a picture of the sponge cake with just chocolate dressing on top, with no icing. It was the 5 kg cake I baked on my daughter’s 1st birthday and it was just as delicious. I have so many of my cake pics, just have to find them from the plethora of images I have on record!
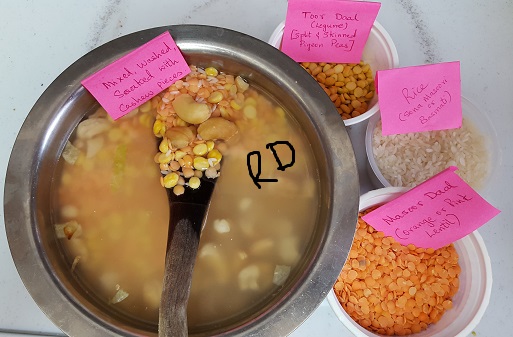
Khicdi is a mix of rice and legumes. I add as many veggies I can to make it a wholesome dish. The spices and herbs you see in the dish have great health benefits. The dish by itself is Vegan. Tastes best with Yogurt on the side or mixed into it but I am a Vegan so I do not use Yogurt. I eat it with Soup, a curry, or just by itself.
This is a Gujurati Dish. I am a Gujurati, belonging to a West Indian state called Gujurat. Rice and Daal (Legumes, lentils, pulses) are our staple food and part of almost every or every other meal.
Add Salt as needed
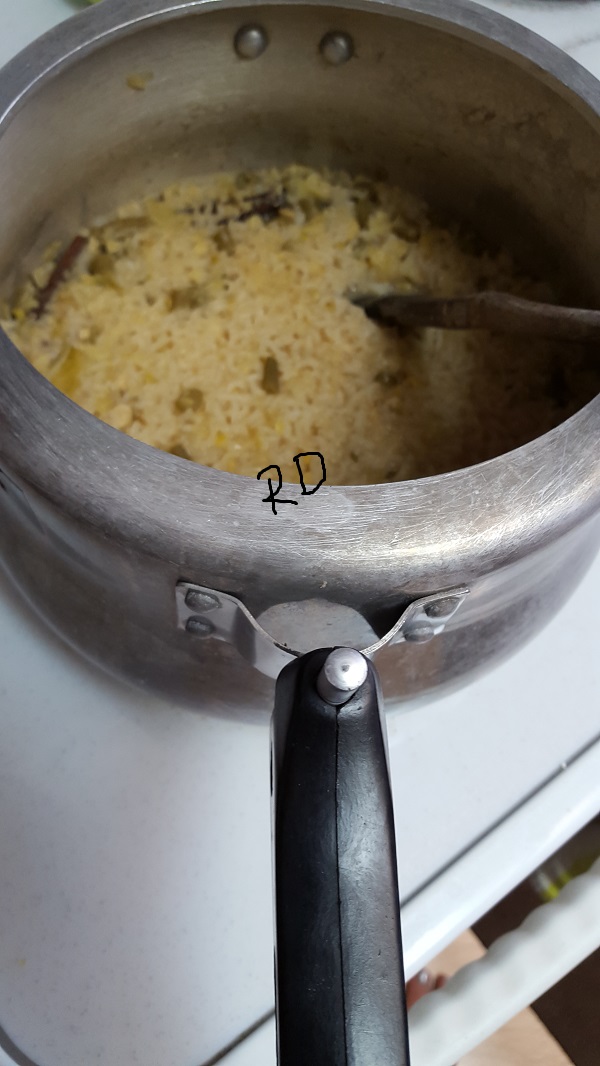
4-5 whistles in the pressure cooker.
This High Protein Dish is ready to eat. Tastes best with Yogurt or Indian Kadhi.
Alternatively, we can shallow fry the khicdi for an added taste. This procedure lifts the taste to a totally new level.
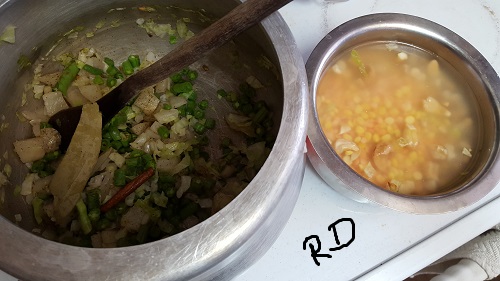
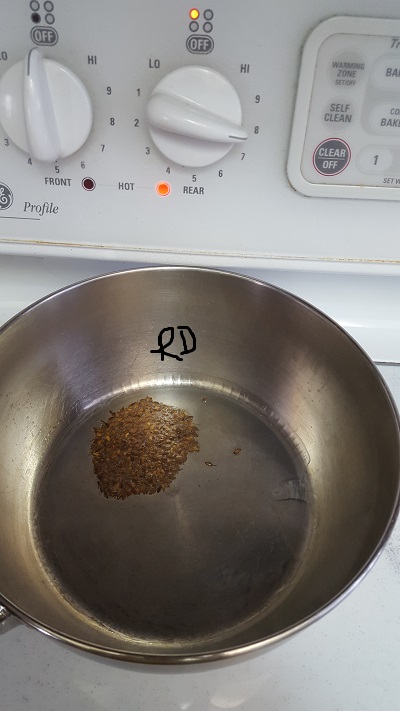
Oil – 1 Tbsp
Cumin Seeds – 1 tsp.
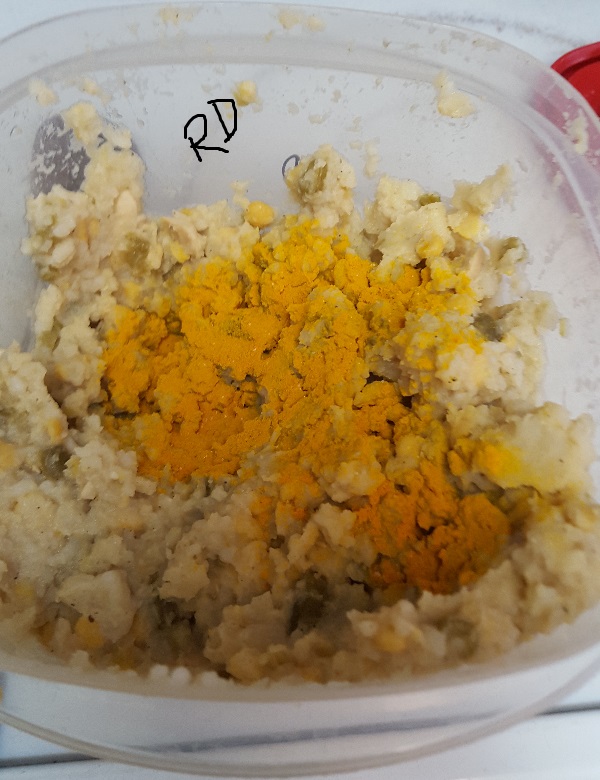
while the seeds burst, take the rice and add asafoetida (hing) 2 pinches and turmeric powder 1/2 tsp.
Asafoetida helps digestion and prevents gas or bloating from the legume
Turmeric is an antibiotic and has several health benefits.
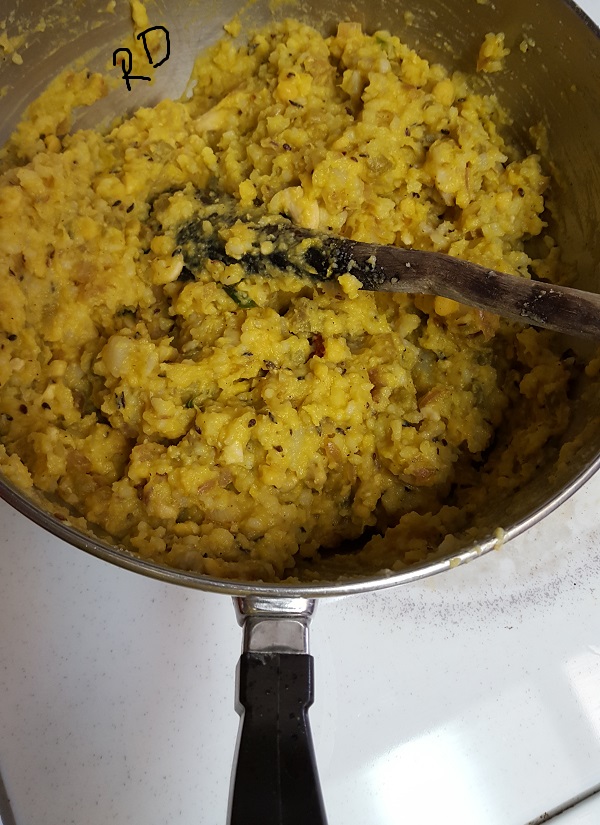
READY!!
Top with Cilantro to add color, flavor – I was out of Cilantro!
Crepe is a French word for a thin pancake which can essentially be curled up. Crepes have been an integral part of North and West Indian cooking for several decades. They make for a nutritious and a filling meal, all curled up together.
Being an artistic leader is an essential part of my personality and that shows up pretty well in the kitchen too. Rarely do I read a recipe from start to end and follow it to the T! I have always preferred to be the one creating a recipe than the one who follows it. Today was something like that. I brought out the ingredients and then asked myself – how to use these to make dinner? ‘Ting’ went my mind – OATMEAL CREPE
Find the Ingredient Photographs below.
Oatmeal – 3 cups and churn into dry powder
Poha (Beaten Rice) – 2 cups and churn into dry powder
Urad Daal (Split black gram: split and hulled so that only the white part is used) – 2 cups and churn into dry powder
Kale – 4 cups
Spring Onions – One bunch – appx. 5 thin.
Salt to taste
Pepper 3-4 Tbsps.
Cinnamon powder – 1 Tbsp.
Red Chili Powder – 1 tsp.
Water to make a medium thick, flowy batter
HOW TO:
Churn all well in as many batches as needed. The batter looks a bit grainy and that is ok. Add water whenever needed. If the batter is not used immediately, it may soak up water and look thicker when removed for use. Use your discretion in adding water. Spread on warm non-stick skillet. Make crepes as usual!
PROBLEM AREAS?
If it lumps up on the warm skillet, then it surely needs water. If it is so thin or soft that the crepe breaks on the skillet, then you may churn up either of the above dry ingredient into a powder and add it. You may even directly add Bengal gram flour which helps in binding ingredients. Remember at least part of the batter a churn in the blender once you add any dry flour to it. This will help keep the batter smooth and easy to spread.
The batter can be stored in the refrigerator for up to 7 days however, best flavor when consumed within 3 days!
SUCCESS STORY! :D
My family over-ate today! They said they loved it! It is a great recipe for kids too since they can roll it and eat by themselves by dipping in butter, sauce, or cilantro and tamarind dips. Use it while travelling!!!
Although Falafel is a Mid-East recipe, every Indian knows how to incorporate his /her own taste and definition to a recipe from around the world. In case if you haven’t already heard, Indians are good ‘Creative Copy-Cats (CCC)’, the way I put it! lol
So here is my CCC Falafel half inspired by me watching my talented aunt cook Falafel a few years ago and half inspired by my crazy mind. This purely Vegetarian dish can also be made VEGAN by keeping out the Optional Ingredients and can be awed for its nutritional fillers- high proteins, calcium, iron, with moderate carbs and fats.
We need:
Butter as per needed on the bread slice when preparing final serving
½ Onion – white or red (in India onions are way smaller in size, may require to use 2 onions, refer to my picture below to know the quantity)
2 inch stick of cinnamon
2 cloves
1 tsp black pepper – crushed or powder
Sesame seeds – ½ cup
* Optional ingredient: Yogurt – ½ cup
Salt as per needed for each time of use
1 cup chick peas or garbanzo beans soaked for 6hours.
1 big palm sized potato or equivalent number of small size
* Optional: Paneer – cottage cheese, crushed to make half to one cup. Make at home by boiling and tearing boiling milk with vinegar or lemon. You can find tons of recipes for how to make paneer at home or get Ready paneer from store. In Usa, you will find Paneer in the frozen section of Indian stores
* Optional: Cheese – 1/4th cup
Tabasco: 4drops
Sriracha Sauce: 1/4th to ½ tsp (as spicy as you want
HOW TO COOK IT
Roast white sesame seeds in a non-stick pan on med to low heat until they turn light brown. Stir every minute, making sure you are tossing those seeds around pretty well. They do love carousel rides!
Once light brown remove from stove and allow to cool in a cool area of home, preferably out of the kitchen and under the fan (make sure your fan is clean ;))
Meanwhile, we will prepare the base of our stuffing. chop fine. Red onion is ok too.
Pressure cooker or any untensil to boil the garbanzo beans.
In med. to big sized Pressure Cooker (or Rice cooker), 1 Tbsp of oil; when hot, add 2 inch stick of cinnamon, 2 cloves, 1 tsp crushed black pepper or black pepper powder.
add onions, roast on med to high flame till translucent in color.
Add garbanzo / chick peas and fill water to 2-3 inches above chick peas.
To make the chick peas softer, add salt to
Boil in cooker with 6 whistles. (Adjust whistle no. as per your cooker)
Kept to boil in pressure cooker
10. Meanwhile we will make our own version of ‘ Tahini Dip’. Crush the cooled sesame seeds in a dry grinder 1st
11. Once crushed, add 1 Tbsp cooking oil to the dry, ground sesame powder. Churn it once if needed. Add 3 Filled Tbsp of Yogurt (*optional, this is my own addition) and store this dip in a tightly covered container to preserve the flavor.
12. When the pressure cooker cools, separate the potato from the chick peas
13. Peel potato skin. Mash the boiled, peeled potato and add paneer – cottage cheese. Top with salt and 1tsp of red chilli powder (add more or less as per requirement)
14. Add quarter cup cheese
15. Mash the chickpeas, potato, paneer all in one
16. Add salt, tabasco 4 drops, 1/4 to 1/2 tsp Sriracha sauce (as spicy as needed)
17. All the parts are ready. Unlike Traditional Falafel, I do not make them into balls. I leave it like a paste.
Chick pea paste with Tahini Dip on the right
18. Take your Bread slices, add butter, layer with tahini dip, chick peas paste, bite into this delightful dish!